
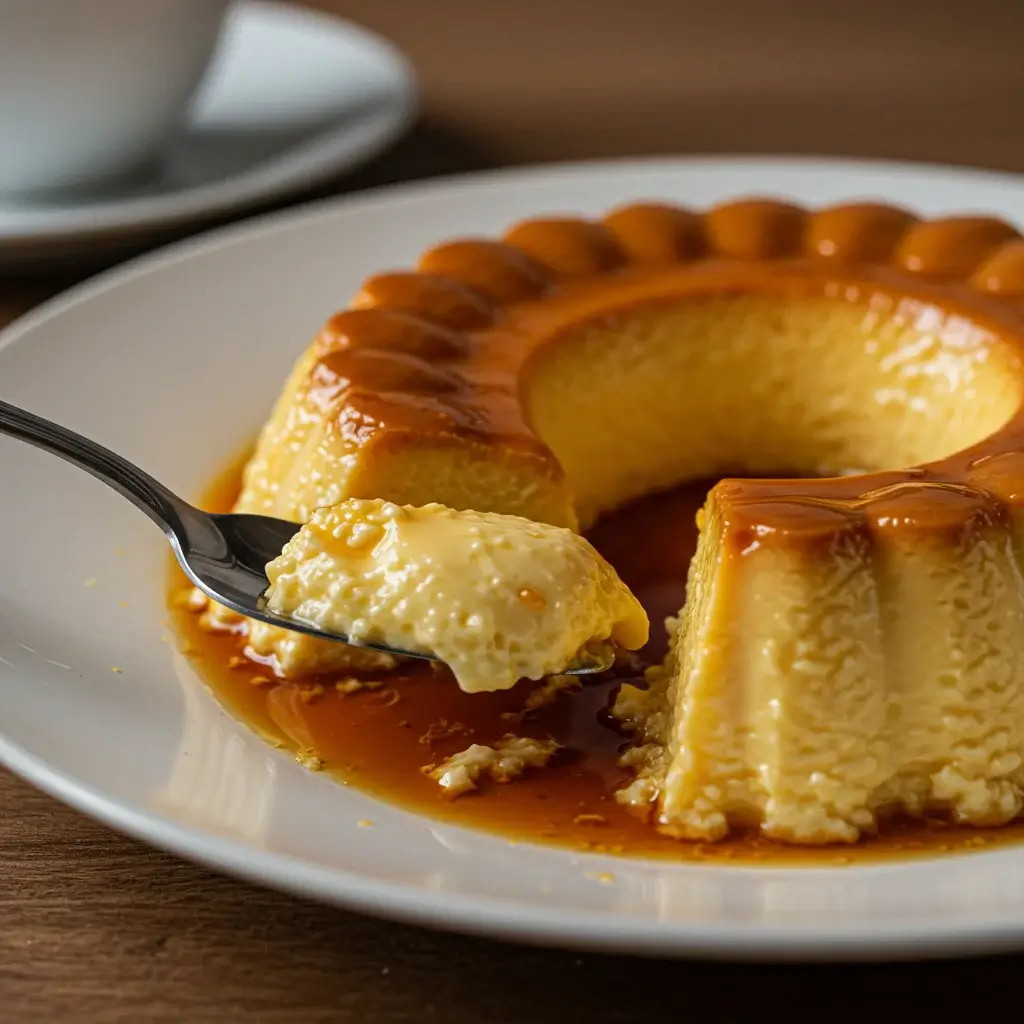
The allure of traditional desserts lies in their timeless appeal and the comfort they bring. One such classic is the Brazilian Pudim, a rich, silky caramel flan that effortlessly melts in your mouth. Known for its simple yet indulgent flavor, this dessert is a staple in Brazilian households and is beloved by many around the world. In this comprehensive guide, we’ll explore everything you need to know to make this delightful treat, from the list of ingredients to serving suggestions.
Ingredients
Creating the perfect Brazilian Pudim requires just a handful of ingredients, each contributing to its luxurious texture and flavor. Here’s what you’ll need:
- 1 cup of granulated sugar (for the caramel)
- 1 can (14 ounces) of sweetened condensed milk
- 2 cups of whole milk
- 3 large eggs
- 1 tablespoon of vanilla extract
These ingredients come together to create a dessert that is both simple and sophisticated, with each component playing a crucial role in achieving that melt-in-your-mouth texture.
Instructions
Making a Brazilian Pudim is a straightforward process, but it requires careful attention to detail to ensure the perfect outcome. Follow these steps to create your own decadent flan:
Step 1: Prepare the Caramel
- Melt the Sugar: In a medium saucepan over medium heat, add the granulated sugar. Stir continuously as it melts and turns a golden-brown color, which should take about 8-10 minutes.
- Pour the Caramel: Immediately pour the melted caramel into a 9-inch round cake pan, tilting the pan to evenly coat the bottom. Allow it to cool and harden while you prepare the custard.
Step 2: Make the Custard
- Blend the Ingredients: In a large mixing bowl, combine the sweetened condensed milk, whole milk, eggs, and vanilla extract. Use a blender or an immersion blender to mix until smooth and well combined.
- Strain the Mixture: To ensure a silky texture, strain the custard mixture through a fine-mesh sieve into a separate bowl, removing any egg solids.
Step 3: Assemble and Bake
- Pour the Custard: Carefully pour the strained custard over the hardened caramel in the cake pan.
- Prepare the Water Bath: Place the cake pan in a larger baking dish. Fill the larger dish with hot water until it reaches halfway up the sides of the cake pan, creating a water bath.
- Bake: Preheat your oven to 350°F (175°C). Bake the pudim for about 50-60 minutes, or until the edges are set and the center slightly jiggles.
- Cool: Remove the pudim from the oven and allow it to cool in the water bath for about 30 minutes. Then, refrigerate for at least 4 hours or overnight.
Step 4: Serve the Pudim
- Unmold: Run a knife around the edges of the pudim to loosen it from the pan. Place a large serving plate over the pan and invert quickly to release the flan.
- Slice and Enjoy: Cut into slices and serve, allowing the caramel to drizzle over each piece.
Nutrition Facts
Understanding the nutritional content of your dessert can help you enjoy it mindfully. Here is an approximate breakdown of the nutrition facts for a typical serving of Brazilian Pudim:
- Calories: 280
- Total Fat: 8g
- Cholesterol: 80mg
These values can vary based on the specific brands and quantities of ingredients used, but they provide a general idea of what to expect from this decadent treat.
How to Serve
Brazilian Pudim is a beloved dessert that holds a special place in the hearts of many. Its luscious, creamy texture combined with a rich caramel sauce makes it a delightful treat for any occasion. However, how you choose to serve this delectable dish can elevate the experience and impress your guests. Here are some comprehensive ideas for serving your pudim:
Classic Style
The most traditional way to serve Brazilian Pudim is to present it as is, allowing the beautiful caramel sauce to cascade over each slice. To achieve the perfect presentation, carefully invert the pudim onto a serving platter, ensuring that the caramel sauce pools elegantly around the base. Use a sharp knife to slice the pudim into even portions, allowing the sauce to flow over the edges of each slice. This classic approach not only showcases the pudim’s smooth, glossy texture but also highlights the rich flavor of the caramel, providing guests with an authentic experience of this Brazilian favorite.
Garnished
Elevate your pudim by adding a touch of elegance with garnishes that complement its flavors and enhance its visual appeal. Fresh berries, such as strawberries, raspberries, or blueberries, lend a burst of color and a refreshing contrast to the creamy dessert. A few mint leaves can add a pop of vibrant green while imparting a subtle herbal note that brightens the dish. For a richer experience, consider adding a dollop of freshly whipped cream on top or to the side. This not only introduces a light, airy texture but also allows for a delightful mix of flavors as guests enjoy the pudim. For an extra touch of sophistication, consider dusting the top with a sprinkle of cocoa powder or crushed nuts, which adds both flavor and texture.
Paired with Coffee
For a truly authentic Brazilian experience, serve your pudim alongside a strong cup of Brazilian coffee. The bold, robust flavor of the coffee complements the creamy sweetness of the pudim beautifully. Consider brewing a traditional Brazilian coffee, such as a strong espresso or a filtered brew, to enhance the flavors of the dessert. The slight bitterness of the coffee balances the sweetness of the pudim, creating a harmonious pairing that elevates the dining experience. This combination is perfect for after dinner, as the caffeine provides a pleasant pick-me-up while the pudim offers a satisfying conclusion to the meal.
Chilled
One of the most enjoyable aspects of Brazilian Pudim is its smooth, cool texture, which can be enhanced by serving it chilled. After preparing the pudim, allow it to set in the refrigerator for several hours or overnight. When ready to serve, slice the pudim directly from the fridge, ensuring each piece retains its cool, creamy consistency. A chilled pudim is especially refreshing during warmer months or as a light dessert following a hearty meal. To further enhance the refreshing experience, consider serving it with a side of fresh fruit, such as sliced kiwi or citrus segments, which can provide a zesty contrast and an additional layer of flavor.
Creative Variations
Feel free to get creative with your serving ideas! Consider drizzling flavored sauces, such as chocolate or passion fruit, over the top for an exciting twist. You might also serve the pudim in individual ramekins for an elegant presentation, allowing each guest to have their own portion. Adding a sprinkle of sea salt on top of the caramel can bring out the flavors, creating a delightful sweet-and-salty contrast.
In summary, Brazilian Pudim is not just a delicious dessert but also a versatile one that can be served in numerous ways. Whether you choose to serve it in its classic form, adorned with garnishes, paired with coffee, or chilled for a refreshing treat, each method offers a unique experience that highlights the pudim’s delightful flavors and textures. By considering your presentation and pairing options, you can create a memorable dining experience that celebrates this beloved Brazilian dessert.
Additional Tips
Creating the ideal pudim, a beloved Brazilian dessert, can indeed feel like an art form. While the basic recipe provides a solid foundation, these additional tips will help you refine your technique, ensuring a delightful and flawless pudim every time.
Prevent Cracks
Achieving a perfectly smooth and crack-free pudim is largely about controlling the cooking environment. The water bath, or “bain-marie,” is essential for even heat distribution during baking. Here are some strategies to prevent cracks:
- Temperature Control: Preheat your oven to the specified temperature, and avoid opening the oven door frequently, as fluctuations in temperature can cause the pudim to crack.
- Water Bath Maintenance: Start with boiling water in the baking tray to ensure the temperature remains consistent. Keep an eye on the water level during baking; if it starts to evaporate, carefully add more hot water. This not only helps maintain an even cooking temperature but also prevents the pudim from drying out.
- Baking Time: Monitor the baking time closely. Overbaking can lead to cracks, so check for doneness by gently shaking the pan; the center should jiggle slightly but not appear liquid.
Smooth Texture
A velvety texture is one of the hallmarks of a good pudim. To achieve this, the custard mixture must be well-prepared:
- Straining the Mixture: After blending the custard ingredients, pour the mixture through a fine mesh sieve or cheesecloth into the baking pan. This step is crucial as it removes any lumps or bubbles that may have formed, resulting in a smoother, more consistent texture.
- Blending Techniques: Use a high-speed blender or an immersion blender to mix your ingredients thoroughly. This helps incorporate air into the mixture, but be cautious to not over-blend, which can introduce unwanted bubbles.
- Room Temperature Ingredients: Ensure that your eggs and milk are at room temperature before mixing. Cold ingredients can lead to a lumpy custard, while room temperature ingredients blend more seamlessly.
Caramel Mastery
Creating the perfect caramel is a critical step in making pudim, as it forms the luscious topping:
- Sugar Selection: Use granulated sugar for a classic caramel. Avoid brown sugar or powdered sugar, as they can alter the flavor and texture of the caramel.
- Melting Sugar: Place the sugar in a heavy-bottomed saucepan over medium heat. Stir gently at first to ensure all the sugar melts evenly. Once it starts to melt, stop stirring and swirl the pan occasionally to promote even melting.
- Color and Aroma: Watch for a golden amber color, which indicates the caramel is ready. This usually takes about 8-10 minutes, but timing can vary based on your stove and pan. The caramel should also emit a slightly nutty aroma. Be cautious, as it can quickly turn from perfect to burnt.
- Pouring the Caramel: Once the ideal color is reached, remove the pan from heat immediately to prevent further cooking. Quickly and carefully pour the caramel into the prepared baking dish, tilting it to cover the bottom evenly. Be cautious of hot sugar, as it can cause burns.
Cooling Time
The cooling and chilling process is just as important as the baking itself when it comes to pudim:
- Initial Cooling: After removing the pudim from the oven, let it cool at room temperature for about 30 minutes. This helps it to set slightly before being transferred to the refrigerator.
- Refrigeration: Cover the pudim with plastic wrap or a lid and refrigerate for at least 4 hours, though overnight is ideal. This extended cooling time allows the flavors to meld and the custard to firm up, ensuring a perfect slice when you’re ready to serve.
- Serving Tips: When ready to serve, run a knife around the edges of the pudim to loosen it from the pan. Invert it onto a serving plate with a gentle shake, allowing the caramel to cascade down the sides. For an added touch, garnish with fresh fruit or a sprig of mint.
By incorporating these additional tips into your pudim-making process, you’ll be well on your way to creating a dessert that not only looks stunning but also delivers an exquisite flavor and texture. Happy baking!
FAQs
1. Can I make pudim without a water bath?
While it’s possible, the water bath is key to achieving the smooth, creamy texture characteristic of pudim. It ensures even cooking and prevents the custard from curdling.
2. Can I use different types of milk?
Yes, you can experiment with different types of milk, such as almond or coconut milk, for a unique flavor twist. However, using whole milk is recommended for the traditional creamy texture.
3. How long does pudim last in the fridge?
Pudim can be stored in the refrigerator for up to 5 days. Ensure it’s covered properly to maintain freshness.
4. Can I freeze pudim?
Freezing is not recommended as it can alter the texture of the flan, making it less creamy when thawed.
5. What should I do if my caramel hardens before I pour it into the pan?
If the caramel hardens, gently reheat it over low heat until it becomes liquid again, then pour it quickly into the pan.
Conclusion
Creating a Melt-in-Your-Mouth Brazilian Pudim is not only a culinary adventure but also an opportunity to indulge in a rich, creamy dessert that brings a taste of Brazil to your table. With its simple ingredients and straightforward preparation, this flan is a perfect choice for any occasion, from family gatherings to elegant dinner parties. By following this guide, you’ll be able to master the art of making pudim, delighting your taste buds and impressing your guests with every luscious bite. Enjoy the sweet reward of your efforts, and savor the timeless appeal of this beloved dessert.
Print
Melt-in-Your-Mouth Brazilian Pudim
Ingredients
Creating the perfect Brazilian Pudim requires just a handful of ingredients, each contributing to its luxurious texture and flavor. Here’s what you’ll need:
- 1 cup of granulated sugar (for the caramel)
- 1 can (14 ounces) of sweetened condensed milk
- 2 cups of whole milk
- 3 large eggs
- 1 tablespoon of vanilla extract
Instructions
Making a Brazilian Pudim is a straightforward process, but it requires careful attention to detail to ensure the perfect outcome. Follow these steps to create your own decadent flan:
Step 1: Prepare the Caramel
- Melt the Sugar: In a medium saucepan over medium heat, add the granulated sugar. Stir continuously as it melts and turns a golden-brown color, which should take about 8-10 minutes.
- Pour the Caramel: Immediately pour the melted caramel into a 9-inch round cake pan, tilting the pan to evenly coat the bottom. Allow it to cool and harden while you prepare the custard.
Step 2: Make the Custard
- Blend the Ingredients: In a large mixing bowl, combine the sweetened condensed milk, whole milk, eggs, and vanilla extract. Use a blender or an immersion blender to mix until smooth and well combined.
- Strain the Mixture: To ensure a silky texture, strain the custard mixture through a fine-mesh sieve into a separate bowl, removing any egg solids.
Step 3: Assemble and Bake
- Pour the Custard: Carefully pour the strained custard over the hardened caramel in the cake pan.
- Prepare the Water Bath: Place the cake pan in a larger baking dish. Fill the larger dish with hot water until it reaches halfway up the sides of the cake pan, creating a water bath.
- Bake: Preheat your oven to 350°F (175°C). Bake the pudim for about 50-60 minutes, or until the edges are set and the center slightly jiggles.
- Cool: Remove the pudim from the oven and allow it to cool in the water bath for about 30 minutes. Then, refrigerate for at least 4 hours or overnight.
Step 4: Serve the Pudim
- Unmold: Run a knife around the edges of the pudim to loosen it from the pan. Place a large serving plate over the pan and invert quickly to release the flan.
- Slice and Enjoy: Cut into slices and serve, allowing the caramel to drizzle over each piece.
Nutrition
- Serving Size: one normal portion
- Calories: 280
- Fat: 8g
- Cholesterol: 80mg


