
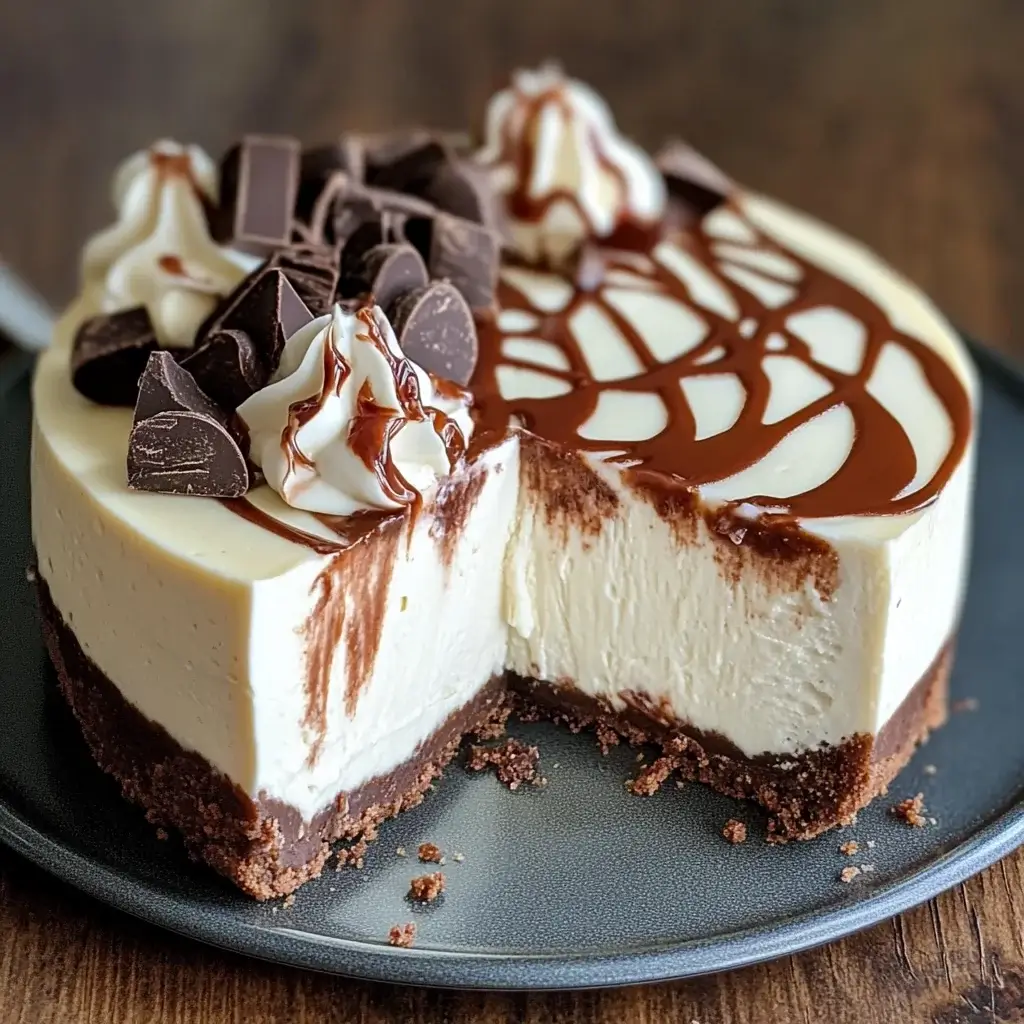
There’s something undeniably magical about a homemade cheesecake. The velvety texture, the rich, satisfying flavor, and the sheer joy it brings to any gathering – it’s a dessert that speaks volumes. Recently, I decided to experiment with a lighter, yet equally decadent version, and the result was nothing short of spectacular: a Yogurt Chocolate Ripple Cheesecake. From the first creamy bite to the last lingering chocolatey note, my family devoured it. Even my usually cheesecake-skeptic uncle couldn’t resist a second slice, proclaiming it “surprisingly light and absolutely divine.” The secret? A generous swirl of Greek yogurt woven into the classic cheesecake base, creating a tangy counterpoint to the rich cream cheese and a beautifully subtle tang that elevates the entire dessert. And of course, the dramatic chocolate ripple, not just for visual appeal, but for that extra layer of indulgent flavor that makes this cheesecake truly irresistible. If you’re looking for a show-stopping dessert that’s both elegant and surprisingly easy to make, and won’t leave you feeling weighed down, this Yogurt Chocolate Ripple Cheesecake is your answer. Prepare to be amazed by how simple ingredients can transform into a dessert masterpiece that will impress everyone from casual guests to the most discerning dessert connoisseurs.
Ingredients: The Building Blocks of Creamy Perfection
Creating this Yogurt Chocolate Ripple Cheesecake is all about using quality ingredients that complement each other to achieve the perfect balance of flavor and texture. Here’s what you’ll need to gather:
- For the Crust:
- Graham Cracker Crumbs: (1 ½ cups) – Provides a classic, slightly sweet and buttery base for the cheesecake. You can buy pre-made crumbs for convenience or crush your own graham crackers for a fresher flavor.
- Unsalted Butter: (6 tablespoons, melted) – Binds the graham cracker crumbs together and adds richness and flavor to the crust, creating a sturdy and delicious foundation.
- Granulated Sugar: (2 tablespoons) – Adds a touch of sweetness to the crust, enhancing the overall flavor profile and balancing the richness of the cheesecake filling.
- For the Cheesecake Filling:
- Cream Cheese: (32 ounces, full-fat, softened) – The star of the show! Full-fat cream cheese is crucial for achieving that signature rich, creamy texture that defines a classic cheesecake. Ensure it’s softened to room temperature for a smooth, lump-free batter.
- Greek Yogurt: (1 cup, plain, full-fat) – This is the secret ingredient! Full-fat Greek yogurt adds a delightful tang, reduces some of the heaviness of traditional cheesecake, and contributes to an incredibly creamy texture. Its slight acidity balances the sweetness perfectly.
- Granulated Sugar: (1 ½ cups) – Sweetens the cheesecake filling and helps create the desired texture. The amount can be adjusted slightly based on your sweetness preference.
- Large Eggs: (4) – Act as a binder, adding richness and structure to the cheesecake. They contribute to the smooth and creamy texture and help the cheesecake set properly.
- Vanilla Extract: (1 teaspoon) – Enhances the overall flavor profile, adding warmth and depth to the cheesecake. A good quality vanilla extract makes a noticeable difference.
- Lemon Juice: (1 tablespoon, fresh) – A touch of acidity brightens the flavors and balances the sweetness of the cheesecake. Fresh lemon juice is preferred for its vibrant taste.
- For the Chocolate Ripple:
- Semi-Sweet Chocolate Chips: (½ cup) – Provides the rich chocolate flavor for the ripple effect. Semi-sweet offers a good balance, but you can use dark or milk chocolate depending on your preference.
- Heavy Cream: (2 tablespoons) – Helps melt the chocolate smoothly and creates a luscious, pourable chocolate sauce for the ripple.
Instructions: Crafting Your Yogurt Chocolate Ripple Cheesecake Step-by-Step
Creating this Yogurt Chocolate Ripple Cheesecake might seem daunting, but breaking it down into simple steps makes it surprisingly manageable. Follow these instructions carefully to achieve cheesecake perfection:
1. Prepare the Graham Cracker Crust:
- Preheat Oven: Preheat your oven to 350°F (175°C). This initial preheating is important for setting the crust and ensuring even baking.
- Combine Crust Ingredients: In a medium bowl, combine the graham cracker crumbs, melted butter, and granulated sugar. Mix well until all the crumbs are evenly moistened and the mixture resembles wet sand.
- Press into Pan: Press the crumb mixture firmly and evenly into the bottom of a 9-inch springform pan. You can use the bottom of a measuring cup or a flat-bottomed glass to achieve a smooth, even crust. Make sure to press it firmly to prevent it from crumbling later.
- Pre-bake Crust: Bake the crust in the preheated oven for 8-10 minutes. This pre-baking step helps the crust set and become slightly golden, preventing it from becoming soggy when the cheesecake filling is added.
- Cool Crust: Remove the pre-baked crust from the oven and let it cool completely while you prepare the cheesecake filling. This is crucial for preventing the crust from getting soggy and ensuring the cheesecake bakes evenly.
2. Make the Yogurt Cheesecake Filling:
- Beat Cream Cheese: In a large bowl or the bowl of a stand mixer fitted with the paddle attachment, beat the softened cream cheese on medium speed until smooth and creamy. Ensure there are no lumps for a perfectly smooth cheesecake. This may take a few minutes.
- Add Sugar and Yogurt: Gradually add the granulated sugar to the cream cheese, beating until well combined and the mixture is light and fluffy. Scrape down the sides of the bowl as needed to ensure everything is evenly mixed. Then, add the Greek yogurt and beat until just combined. Be careful not to overmix at this stage.
- Incorporate Eggs: Beat in the eggs one at a time, mixing well after each addition until just incorporated. Again, avoid overmixing, as this can incorporate too much air and lead to cracks in the cheesecake during baking.
- Add Flavorings: Stir in the vanilla extract and lemon juice. Mix until just combined. The batter should be smooth, creamy, and lump-free.
3. Create the Chocolate Ripple:
- Melt Chocolate: In a microwave-safe bowl, combine the semi-sweet chocolate chips and heavy cream. Microwave in 30-second intervals, stirring after each interval, until the chocolate is completely melted and smooth. Be careful not to overheat the chocolate. Alternatively, you can melt the chocolate and cream in a double boiler over simmering water.
- Swirl Chocolate into Batter: Pour about half of the cheesecake batter into the prepared crust. Drizzle about half of the melted chocolate sauce over the batter in a swirling motion. Pour the remaining cheesecake batter over the chocolate layer. Drizzle the remaining chocolate sauce over the top layer of batter, again creating a swirl pattern using a knife or toothpick. Get creative with your swirls for a beautiful marbled effect!
4. Bake the Cheesecake:
- Water Bath (Optional but Recommended): For the most even baking and to prevent cracking, prepare a water bath. Wrap the bottom of the springform pan tightly in a double layer of heavy-duty aluminum foil to prevent water from seeping in. Place the wrapped pan in a larger roasting pan. Pour hot water into the roasting pan until it comes about halfway up the sides of the springform pan.
- Bake: Carefully place the roasting pan with the cheesecake in the preheated oven. Bake for 60-75 minutes, or until the cheesecake is set around the edges but still slightly jiggly in the center. A slight jiggle in the center is perfect, as the cheesecake will continue to set as it cools.
- Cool Gradually: Turn off the oven and leave the cheesecake inside with the oven door slightly ajar for 1 hour. This gradual cooling process helps prevent cracking. After 1 hour, remove the cheesecake from the oven and water bath. Let it cool completely on a wire rack at room temperature.
- Chill: Once the cheesecake is completely cooled to room temperature, cover it with plastic wrap and refrigerate for at least 6 hours, or preferably overnight. This chilling time is essential for the cheesecake to fully set and develop its flavor and texture.
5. Serve and Enjoy:
- Release from Springform Pan: Before serving, carefully remove the sides of the springform pan. Run a thin knife or spatula around the edge of the cheesecake to loosen it from the pan if needed.
- Garnish (Optional): Garnish with fresh berries, chocolate shavings, whipped cream, or a dusting of cocoa powder, if desired.
- Serve Chilled: Slice and serve your Yogurt Chocolate Ripple Cheesecake chilled. Enjoy the creamy texture, tangy yogurt notes, and delicious chocolate ripple!
Nutrition Facts: A Lighter Indulgence
While cheesecake is undeniably a dessert, this Yogurt Chocolate Ripple Cheesecake offers a slightly lighter profile compared to traditional versions, thanks to the addition of Greek yogurt. Here’s an approximate nutritional breakdown per serving (based on 12 servings):
- Servings: 12
- Calories per Serving: Approximately 350-400 kcal (This is an estimate and can vary based on ingredient brands and specific measurements)
- Fat: 25-30g
Please Note: These values are estimates and should be considered as a general guideline. For precise nutritional information, use a nutrition calculator with the specific brands and quantities of ingredients you use. Remember that while this cheesecake is slightly lighter due to the yogurt, moderation is still key for a balanced diet.
Preparation Time: Plan Ahead for Dessert Perfection
Creating this Yogurt Chocolate Ripple Cheesecake involves a few stages, so it’s best to plan ahead. Here’s a breakdown of the approximate time involved:
- Prep Time: 30-40 minutes (This includes making the crust, preparing the cheesecake filling, and melting the chocolate).
- Bake Time: 60-75 minutes
- Cooling Time (Oven): 1 hour
- Cooling Time (Room Temperature): 2-3 hours
- Chilling Time (Refrigerator): Minimum 6 hours (preferably overnight)
Total Time: Approximately 9-12 hours (including chilling).
While the active preparation time is relatively short, the chilling time is crucial for the cheesecake to set properly and develop its optimal texture and flavor. This makes Yogurt Chocolate Ripple Cheesecake an ideal dessert to prepare the day before you plan to serve it.
How to Serve Your Exquisite Cheesecake
The beauty of Yogurt Chocolate Ripple Cheesecake lies in its versatility. It’s delicious on its own, but you can elevate the serving experience with various accompaniments. Here are some delightful ways to serve it:
- Simply Chilled: Let the cheesecake shine on its own! Serve it chilled straight from the refrigerator to appreciate its creamy texture and balanced flavors.
- With Fresh Berries: A classic pairing! Fresh raspberries, strawberries, blueberries, or a mix of berries provide a burst of freshness and tartness that complements the richness of the cheesecake.
- Drizzled with Chocolate Sauce: Enhance the chocolate ripple with an extra drizzle of warm or cold chocolate sauce. Dark chocolate sauce adds a sophisticated touch, while milk chocolate sauce amplifies the sweetness.
- Topped with Whipped Cream: A light and airy dollop of freshly whipped cream adds a touch of elegance and extra creaminess to each slice.
- Served with Fruit Compote: A homemade fruit compote, such as cherry, blueberry, or raspberry, adds a warm, fruity dimension and beautiful presentation.
- Dusting of Cocoa Powder: A light dusting of unsweetened cocoa powder adds a subtle bitter note and visual appeal, enhancing the chocolate flavors.
- Sprinkled with Chopped Nuts: Toasted chopped nuts, like pecans, walnuts, or almonds, add a delightful crunch and nutty flavor that complements the cheesecake.
- Alongside Vanilla Ice Cream: For an extra indulgent treat, serve a slice of Yogurt Chocolate Ripple Cheesecake with a scoop of creamy vanilla ice cream. The contrast of temperatures and textures is heavenly.
Additional Tips for Cheesecake Success
Mastering the art of cheesecake baking involves a few key techniques. Here are some additional tips to ensure your Yogurt Chocolate Ripple Cheesecake turns out perfectly every time:
- Use Room Temperature Ingredients: Ensure your cream cheese, yogurt, and eggs are at room temperature before you begin. This allows them to blend together smoothly and creates a lump-free batter, resulting in a smoother, creamier cheesecake.
- Don’t Overmix the Batter: Overmixing incorporates too much air into the batter, which can cause the cheesecake to rise too much during baking and then crack as it cools. Mix until just combined and smooth.
- Bake in a Water Bath: A water bath is highly recommended for baking cheesecakes. It creates a humid environment in the oven, which helps the cheesecake bake evenly, prevents cracking, and ensures a moist and tender texture.
- Cool Slowly to Prevent Cracking: Sudden temperature changes can cause cheesecakes to crack. Gradual cooling is crucial. Turn off the oven and let the cheesecake cool inside with the door slightly ajar for an hour before removing it completely.
- Chill Thoroughly Before Serving: Chilling the cheesecake for at least 6 hours, or preferably overnight, is essential. This allows it to fully set, develop its flavor, and achieve that perfect creamy texture. Resist the temptation to slice into it too soon!
- Get Creative with the Chocolate Ripple: Experiment with different swirl patterns to create a visually stunning cheesecake. You can use a toothpick, knife, or even a skewer to create intricate designs.
- Use Full-Fat Yogurt for Best Results: While you can use low-fat yogurt, full-fat Greek yogurt will provide the richest flavor and creamiest texture. The extra fat contributes to the overall indulgence and prevents the cheesecake from becoming dry.
- Store Cheesecake Properly: Store leftover Yogurt Chocolate Ripple Cheesecake in an airtight container in the refrigerator for up to 3-4 days. For longer storage, you can freeze slices individually wrapped in plastic wrap and then placed in a freezer-safe bag or container for up to 2-3 months. Thaw in the refrigerator overnight before serving.
FAQ: Your Cheesecake Questions Answered
Got questions about making Yogurt Chocolate Ripple Cheesecake? We’ve got answers! Here are some frequently asked questions to help you bake with confidence:
Q1: Can I use regular yogurt instead of Greek yogurt?
A: While Greek yogurt is recommended for its thicker consistency and tangy flavor, you can use regular full-fat yogurt. However, you may need to drain some of the excess liquid from regular yogurt by placing it in a cheesecloth-lined sieve over a bowl for a few hours in the refrigerator. Greek yogurt provides a richer and tangier flavor profile that is ideal for this recipe.
Q2: Can I make this cheesecake ahead of time?
A: Absolutely! In fact, Yogurt Chocolate Ripple Cheesecake is an excellent make-ahead dessert. It’s best made at least a day in advance to allow for proper chilling and flavor development. The flavors actually deepen and meld together overnight, making it even more delicious the next day.
Q3: Can I freeze Yogurt Chocolate Ripple Cheesecake?
A: Yes, you can freeze cheesecake successfully. For best results, freeze the cheesecake whole or in individual slices. Wrap it tightly in plastic wrap, then in foil, or place it in a freezer-safe container. Freeze for up to 2-3 months. Thaw overnight in the refrigerator before serving.
Q4: Can I use a different type of crust?
A: Yes, you can customize the crust! Digestive biscuits, vanilla wafers, or even Oreo crumbs (without the cream filling) can be used instead of graham crackers. For a gluten-free option, use gluten-free graham crackers or almond flour crust.
Q5: Can I use different types of chocolate for the ripple?
A: Definitely! Feel free to experiment with different types of chocolate. Dark chocolate will create a richer, more intense chocolate flavor, while milk chocolate will result in a sweeter, creamier ripple. White chocolate can also be used for a beautiful contrast and a different flavor profile.
Q6: How do I prevent my cheesecake from cracking?
A: Cracking is a common concern with cheesecakes, but it can be minimized by following these tips: Use a water bath, don’t overmix the batter, bake at a lower temperature, and cool the cheesecake gradually in the oven. Room temperature ingredients also help prevent cracking.
Q7: Can I make this cheesecake gluten-free?
A: Yes, you can easily make this Yogurt Chocolate Ripple Cheesecake gluten-free by using gluten-free graham crackers or making an almond flour crust. Ensure all other ingredients are also certified gluten-free if you are strictly avoiding gluten.
Q8: Can I reduce the sugar in this recipe?
A: You can slightly reduce the sugar, but keep in mind that sugar contributes to the texture and structure of the cheesecake. Reducing it too much might affect the final result. Start by reducing it by ¼ cup and see if it suits your taste. You can also consider using a sugar substitute, but be aware that this may alter the texture and flavor slightly.
With these tips and answers in hand, you’re well-equipped to bake a truly magnificent Yogurt Chocolate Ripple Cheesecake. Get ready to impress your family and friends with this creamy, tangy, and utterly irresistible dessert! Enjoy the baking process and savor every delicious bite!
Print
Yogurt Chocolate Ripple Cheesecake
Ingredients
Creating this Yogurt Chocolate Ripple Cheesecake is all about using quality ingredients that complement each other to achieve the perfect balance of flavor and texture. Here’s what you’ll need to gather:
- For the Crust:
- Graham Cracker Crumbs: (1 ½ cups) – Provides a classic, slightly sweet and buttery base for the cheesecake. You can buy pre-made crumbs for convenience or crush your own graham crackers for a fresher flavor.
- Unsalted Butter: (6 tablespoons, melted) – Binds the graham cracker crumbs together and adds richness and flavor to the crust, creating a sturdy and delicious foundation.
- Granulated Sugar: (2 tablespoons) – Adds a touch of sweetness to the crust, enhancing the overall flavor profile and balancing the richness of the cheesecake filling.
- For the Cheesecake Filling:
- Cream Cheese: (32 ounces, full-fat, softened) – The star of the show! Full-fat cream cheese is crucial for achieving that signature rich, creamy texture that defines a classic cheesecake. Ensure it’s softened to room temperature for a smooth, lump-free batter.
- Greek Yogurt: (1 cup, plain, full-fat) – This is the secret ingredient! Full-fat Greek yogurt adds a delightful tang, reduces some of the heaviness of traditional cheesecake, and contributes to an incredibly creamy texture. Its slight acidity balances the sweetness perfectly.
- Granulated Sugar: (1 ½ cups) – Sweetens the cheesecake filling and helps create the desired texture. The amount can be adjusted slightly based on your sweetness preference.
- Large Eggs: (4) – Act as a binder, adding richness and structure to the cheesecake. They contribute to the smooth and creamy texture and help the cheesecake set properly.
- Vanilla Extract: (1 teaspoon) – Enhances the overall flavor profile, adding warmth and depth to the cheesecake. A good quality vanilla extract makes a noticeable difference.
- Lemon Juice: (1 tablespoon, fresh) – A touch of acidity brightens the flavors and balances the sweetness of the cheesecake. Fresh lemon juice is preferred for its vibrant taste.
- For the Chocolate Ripple:
- Semi-Sweet Chocolate Chips: (½ cup) – Provides the rich chocolate flavor for the ripple effect. Semi-sweet offers a good balance, but you can use dark or milk chocolate depending on your preference.
- Heavy Cream: (2 tablespoons) – Helps melt the chocolate smoothly and creates a luscious, pourable chocolate sauce for the ripple.
Instructions
Creating this Yogurt Chocolate Ripple Cheesecake might seem daunting, but breaking it down into simple steps makes it surprisingly manageable. Follow these instructions carefully to achieve cheesecake perfection:
1. Prepare the Graham Cracker Crust:
- Preheat Oven: Preheat your oven to 350°F (175°C). This initial preheating is important for setting the crust and ensuring even baking.
- Combine Crust Ingredients: In a medium bowl, combine the graham cracker crumbs, melted butter, and granulated sugar. Mix well until all the crumbs are evenly moistened and the mixture resembles wet sand.
- Press into Pan: Press the crumb mixture firmly and evenly into the bottom of a 9-inch springform pan. You can use the bottom of a measuring cup or a flat-bottomed glass to achieve a smooth, even crust. Make sure to press it firmly to prevent it from crumbling later.
- Pre-bake Crust: Bake the crust in the preheated oven for 8-10 minutes. This pre-baking step helps the crust set and become slightly golden, preventing it from becoming soggy when the cheesecake filling is added.
- Cool Crust: Remove the pre-baked crust from the oven and let it cool completely while you prepare the cheesecake filling. This is crucial for preventing the crust from getting soggy and ensuring the cheesecake bakes evenly.
2. Make the Yogurt Cheesecake Filling:
- Beat Cream Cheese: In a large bowl or the bowl of a stand mixer fitted with the paddle attachment, beat the softened cream cheese on medium speed until smooth and creamy. Ensure there are no lumps for a perfectly smooth cheesecake. This may take a few minutes.
- Add Sugar and Yogurt: Gradually add the granulated sugar to the cream cheese, beating until well combined and the mixture is light and fluffy. Scrape down the sides of the bowl as needed to ensure everything is evenly mixed. Then, add the Greek yogurt and beat until just combined. Be careful not to overmix at this stage.
- Incorporate Eggs: Beat in the eggs one at a time, mixing well after each addition until just incorporated. Again, avoid overmixing, as this can incorporate too much air and lead to cracks in the cheesecake during baking.
- Add Flavorings: Stir in the vanilla extract and lemon juice. Mix until just combined. The batter should be smooth, creamy, and lump-free.
3. Create the Chocolate Ripple:
- Melt Chocolate: In a microwave-safe bowl, combine the semi-sweet chocolate chips and heavy cream. Microwave in 30-second intervals, stirring after each interval, until the chocolate is completely melted and smooth. Be careful not to overheat the chocolate. Alternatively, you can melt the chocolate and cream in a double boiler over simmering water.
- Swirl Chocolate into Batter: Pour about half of the cheesecake batter into the prepared crust. Drizzle about half of the melted chocolate sauce over the batter in a swirling motion. Pour the remaining cheesecake batter over the chocolate layer. Drizzle the remaining chocolate sauce over the top layer of batter, again creating a swirl pattern using a knife or toothpick. Get creative with your swirls for a beautiful marbled effect!
4. Bake the Cheesecake:
- Water Bath (Optional but Recommended): For the most even baking and to prevent cracking, prepare a water bath. Wrap the bottom of the springform pan tightly in a double layer of heavy-duty aluminum foil to prevent water from seeping in. Place the wrapped pan in a larger roasting pan. Pour hot water into the roasting pan until it comes about halfway up the sides of the springform pan.
- Bake: Carefully place the roasting pan with the cheesecake in the preheated oven. Bake for 60-75 minutes, or until the cheesecake is set around the edges but still slightly jiggly in the center. A slight jiggle in the center is perfect, as the cheesecake will continue to set as it cools.
- Cool Gradually: Turn off the oven and leave the cheesecake inside with the oven door slightly ajar for 1 hour. This gradual cooling process helps prevent cracking. After 1 hour, remove the cheesecake from the oven and water bath. Let it cool completely on a wire rack at room temperature.
- Chill: Once the cheesecake is completely cooled to room temperature, cover it with plastic wrap and refrigerate for at least 6 hours, or preferably overnight. This chilling time is essential for the cheesecake to fully set and develop its flavor and texture.
5. Serve and Enjoy:
- Release from Springform Pan: Before serving, carefully remove the sides of the springform pan. Run a thin knife or spatula around the edge of the cheesecake to loosen it from the pan if needed.
- Garnish (Optional): Garnish with fresh berries, chocolate shavings, whipped cream, or a dusting of cocoa powder, if desired.
- Serve Chilled: Slice and serve your Yogurt Chocolate Ripple Cheesecake chilled. Enjoy the creamy texture, tangy yogurt notes, and delicious chocolate ripple!
Nutrition
- Serving Size: one normal portion
- Calories: 400
- Fat: 30g


