
It’s funny, isn’t it? Marshmallows, those puffy clouds of sugary goodness, are often relegated to the “treat” category, something to be enjoyed sparingly, especially if you’re watching your sugar intake. My family, however, has a serious sweet tooth, and the idea of completely banishing marshmallows from our lives felt… well, a little sad. So, I embarked on a mission: to create a sugar-free marshmallow that was just as delightful as the original, without the sugar crash and guilt. After several attempts (some stickier than others, let me tell you!), I finally cracked the code. And let me tell you, these sugar-free marshmallows are a game-changer! My kids devour them in hot chocolate, they’re perfect for roasting over a fire (yes, they get that lovely golden brown!), and I can even sneak a few guilt-free without derailing my own healthy eating goals. Honestly, they’re so good, you’d never know they’re sugar-free. This recipe has become a staple in our house, and I’m so excited to share it with you, so you too can enjoy the fluffy, sweet delight of marshmallows, completely guilt-free.
Ingredients for Sugar-Free Marshmallows
Here’s what you’ll need to create these delectable sugar-free marshmallows. Don’t be intimidated by the ingredient list; most are pantry staples, and the process is surprisingly straightforward!
- Water (Cold): 1 cup, divided – Essential for blooming the gelatin and creating the syrup base. Cold water is crucial for proper gelatin hydration.
- Gelatin Powder (Unflavored): 3 tablespoons – The magic ingredient that gives marshmallows their signature bouncy, chewy texture. Make sure it’s unflavored for a pure marshmallow taste.
- Sweetener (Powdered Erythritol or Allulose): 1 ½ cups – Our sugar substitute! Powdered erythritol or allulose are excellent choices as they dissolve smoothly and provide a clean sweetness without any aftertaste. Powdered versions are preferred to avoid graininess.
- Water (Hot): ½ cup – Used to dissolve the sweetener and create a smooth syrup. Hot water ensures the sweetener dissolves completely and integrates seamlessly into the mixture.
- Vanilla Extract: 2 teaspoons – Adds that classic marshmallow flavor. Use pure vanilla extract for the best taste. You can also experiment with other extracts like almond or peppermint for variations.
- Salt: ¼ teaspoon – Enhances the sweetness and balances the overall flavor profile. Just a pinch is enough to make a difference.
- Optional: Powdered Sugar-Free Sweetener for Dusting: For coating the marshmallows and preventing stickiness. This is optional but highly recommended for easier handling and a more professional finish.
Step-by-Step Instructions for Making Sugar-Free Marshmallows
Now for the fun part – making the marshmallows! Follow these detailed instructions carefully for marshmallow perfection.
- Bloom the Gelatin: In a heatproof bowl (like a stand mixer bowl or a large glass bowl), pour ½ cup of cold water. Sprinkle the gelatin powder evenly over the cold water. Let it sit undisturbed for 5-10 minutes. This process, called blooming, allows the gelatin to hydrate and properly activate, which is crucial for the marshmallow structure. You’ll notice the mixture becoming thick and jelly-like.
- Prepare the Sweetener Syrup: While the gelatin is blooming, combine the powdered sweetener and the remaining ½ cup of cold water in a saucepan. Stir well to ensure the sweetener is mostly dissolved. Place the saucepan over medium heat.
- Heat the Sweetener Mixture: Heat the sweetener mixture, stirring occasionally, until it comes to a simmer. You want the sweetener to fully dissolve and the mixture to become clear. Do not boil it vigorously. Once simmering, reduce the heat to low and gently simmer for about 5 minutes. This step further ensures the sweetener is completely dissolved and creates a slightly thickened syrup.
- Dissolve the Gelatin: Pour the hot sweetener syrup over the bloomed gelatin in the bowl. Immediately whisk the mixture vigorously until the gelatin is completely dissolved and the mixture is smooth. Continue whisking until the mixture becomes slightly cloudy and thickened. This step is crucial for incorporating the hot syrup with the gelatin and ensuring a homogenous mixture.
- Whip the Marshmallow Mixture: If using a stand mixer, attach the whisk attachment. Beat the mixture on medium-high speed for 8-10 minutes, or until the mixture becomes very thick, glossy white, and has increased significantly in volume. If using a hand mixer, use a large bowl and whisk on high speed for a similar duration. The mixture should resemble stiffly whipped egg whites and hold its shape. This whipping process incorporates air, giving the marshmallows their signature light and fluffy texture.
- Add Flavorings: Once the marshmallow mixture is thick and whipped, reduce the mixer speed to low and add the vanilla extract and salt. Mix until just combined. Be careful not to overmix at this stage.
- Prepare the Pan: While the mixture is whipping, lightly grease an 8×8 inch baking dish (or similar size) with coconut oil spray or a neutral oil. If desired, you can line the dish with parchment paper, leaving an overhang on the sides, for easier removal later. Dust the bottom and sides of the greased pan generously with powdered sugar-free sweetener to prevent sticking. This step is essential for easy marshmallow removal and prevents them from sticking to the pan.
- Pour into the Pan: Immediately pour the whipped marshmallow mixture into the prepared pan and spread it evenly with a spatula. Work quickly as the mixture will start to set relatively fast. Smooth the top as much as possible for a neat finish.
- Set the Marshmallows: Dust the top of the marshmallow mixture generously with more powdered sugar-free sweetener. This will create a protective layer and prevent stickiness as they set. Cover the pan loosely with plastic wrap or foil and refrigerate for at least 4-6 hours, or preferably overnight, to allow the marshmallows to fully set and firm up. This chilling time is crucial for the marshmallows to become solid and sliceable.
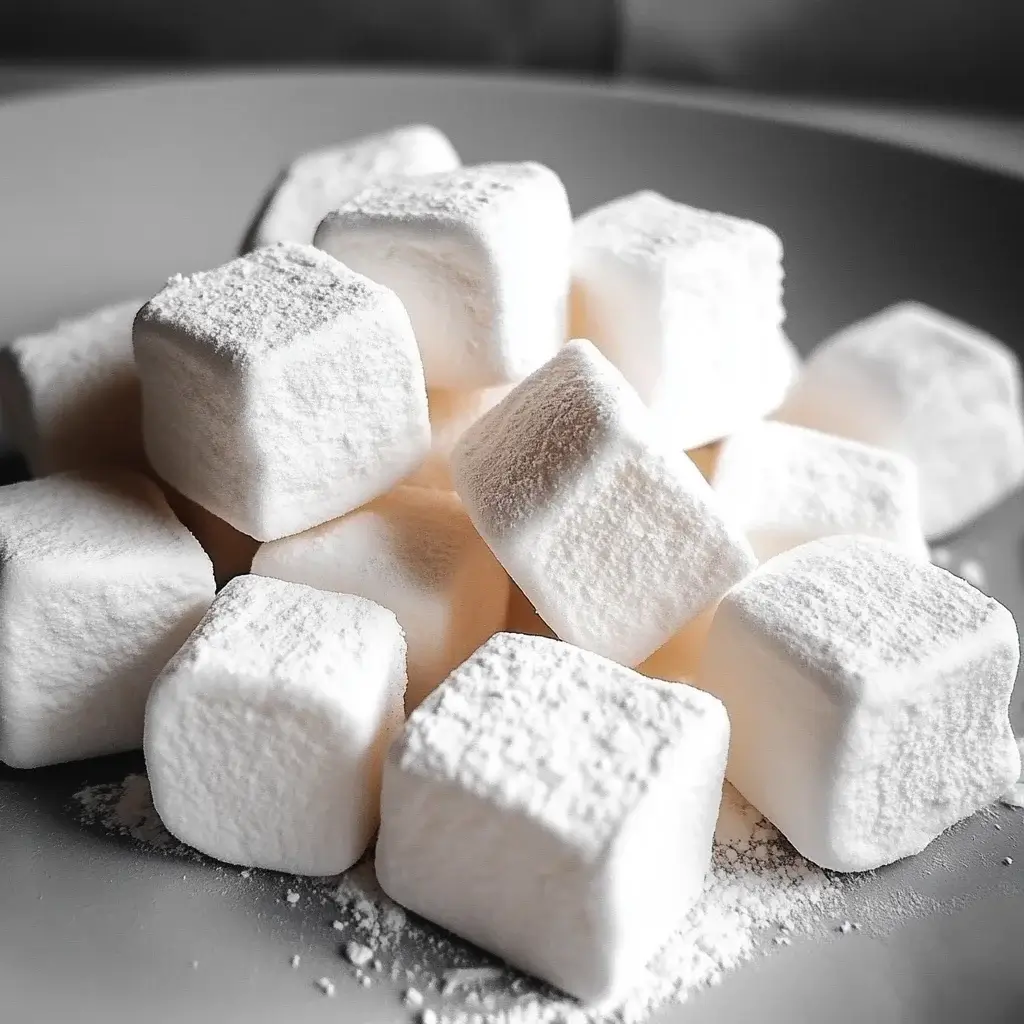
- Cut and Dust: Once the marshmallows are fully set, loosen the edges with a knife or spatula. If using parchment paper, lift the marshmallows out of the pan using the overhang. If not, carefully invert the pan onto a cutting board. Use a sharp knife or pizza cutter, dusted with powdered sugar-free sweetener, to cut the marshmallows into squares or desired shapes. Dust all sides of the marshmallows with more powdered sugar-free sweetener to prevent them from sticking together.
- Enjoy! Your homemade sugar-free marshmallows are now ready to enjoy! Store them in an airtight container at room temperature for up to a week.
Nutrition Facts for Sugar-Free Marshmallows
(Per serving, approximately 1 large marshmallow – recipe yields approximately 16 servings)
- Calories: Approximately 25-35 kcal
- Net Carbs: 0-1g (depending on sweetener used and individual digestion)
Note: Nutritional information is an estimate and can vary based on specific ingredients and serving sizes. Always check the labels of your ingredients for precise nutritional data.
Preparation Time for Sugar-Free Marshmallows
This recipe is relatively quick to prepare, with most of the time spent waiting for the marshmallows to set.
- Prep Time: 20-25 minutes (includes blooming gelatin, making syrup, and whipping)
- Setting Time: 4-6 hours (or overnight)
- Total Time: 4 hours 20 minutes – Overnight
While the active preparation time is short, remember to factor in the setting time for best results. Planning ahead is key!
How to Serve Sugar-Free Marshmallows
These versatile sugar-free marshmallows can be enjoyed in countless ways! Here are some delicious serving suggestions:
- Classic Hot Chocolate Topping: The quintessential marshmallow pairing! Drop a few into a mug of steaming sugar-free hot chocolate for a cozy and comforting treat. They melt beautifully and add a touch of sweetness and fluffiness.
- Roasted Marshmallows: Yes, you can roast sugar-free marshmallows! Skewer them and roast them over a campfire, grill, or even a gas stovetop until golden brown and slightly gooey. The slight caramelization adds a wonderful depth of flavor.
- S’mores (Sugar-Free Style): Create guilt-free s’mores using sugar-free graham crackers and sugar-free chocolate. The roasted marshmallows will melt perfectly between the crackers and chocolate for a classic campfire treat without the sugar overload.
- Marshmallow Fluff (Sugar-Free): Whip the marshmallows with a little bit of warm water or sugar-free milk until they become a smooth, fluffy “fluff.” Use this as a topping for desserts, fruit, or even sugar-free ice cream.
- Rice Krispie Treats (Sugar-Free): Melt these marshmallows with a little bit of butter or coconut oil and combine with puffed rice cereal (check labels to ensure sugar-free or low-sugar options). Press into a pan to make a healthier version of classic rice krispie treats.
- Dessert Garnish: Chop or slice the marshmallows and use them as a decorative and delicious garnish for cakes, cupcakes, brownies, or other desserts.
- Coffee or Tea Sweetener: Add a marshmallow or two to your coffee or tea for a touch of sweetness and a unique flavor. They melt slowly and add a subtle marshmallow essence.
- Trail Mix Addition: Cut the marshmallows into smaller pieces and add them to your homemade sugar-free trail mix for a sweet and chewy element.
Additional Tips for Perfect Sugar-Free Marshmallows
Making marshmallows can be a bit finicky, but with these tips, you’ll be a marshmallow pro in no time!
- Use a Reliable Sweetener: Erythritol and allulose are highly recommended for sugar-free marshmallows as they dissolve well and provide a clean taste. Avoid sweeteners that can crystallize or leave an aftertaste, like stevia in its raw form (powdered stevia blends can sometimes work better).
- Powdered Sweetener is Key: Always use powdered sweetener, not granulated. Granulated sweeteners can result in a grainy texture in your marshmallows, which is not desirable. If you only have granulated sweetener, you can pulse it in a food processor or blender until it becomes powdered.
- Bloom the Gelatin Properly: Don’t skip the blooming step! It’s essential for the gelatin to hydrate fully and activate properly, leading to the correct marshmallow texture. Make sure to sprinkle the gelatin evenly over cold water and let it sit undisturbed.
- Whip Long Enough: Whipping the marshmallow mixture for the full 8-10 minutes (or even slightly longer) is crucial for achieving that light and fluffy texture. Don’t cut the whipping time short, even if it seems like it’s taking a while. The mixture needs to reach a thick, glossy, and voluminous consistency.
- Work Quickly: Once the marshmallow mixture is whipped, it starts to set relatively quickly. Have your pan prepared and be ready to pour the mixture in immediately and spread it evenly.
- Generously Dust with Sweetener: Dusting the pan and the top of the marshmallows with powdered sugar-free sweetener is not just for aesthetics; it’s crucial for preventing stickiness. Be generous with the dusting at each stage to ensure easy handling and prevent the marshmallows from sticking to the pan, your knife, or each other.
- Chill Thoroughly: Allow the marshmallows to chill in the refrigerator for at least 4-6 hours, or preferably overnight. This extended chilling time is necessary for them to fully set and firm up enough to be easily cut and handled. Rushing this step can lead to soft, sticky marshmallows.
- Experiment with Flavors: While vanilla extract is classic, don’t be afraid to experiment with other flavorings! Try almond extract, peppermint extract, citrus zest (like lemon or orange), or even a pinch of cinnamon or nutmeg for unique marshmallow variations. Add these flavorings along with the vanilla extract in step 6.
Frequently Asked Questions (FAQ) About Sugar-Free Marshmallows
Got questions about making sugar-free marshmallows? Here are answers to some common queries to help you succeed!
Q1: Can I use a different sweetener instead of erythritol or allulose?
A: While erythritol and allulose are highly recommended for their clean taste and texture in marshmallows, you can experiment with other powdered sugar-free sweeteners like powdered monk fruit sweetener or powdered stevia blends. However, be mindful that some sweeteners may have a slight aftertaste or affect the texture slightly. Avoid liquid sweeteners as they can alter the syrup consistency.
Q2: My marshmallows are sticky, what did I do wrong?
A: Stickiness is often caused by not using enough powdered sweetener for dusting, or not chilling the marshmallows long enough. Ensure you generously dust the pan and the top of the marshmallows before chilling and again after cutting. Also, make sure they are chilled for at least 4-6 hours, or preferably overnight, to fully set. If your kitchen is very humid, this can also contribute to stickiness; consider storing them in a slightly drier environment.
Q3: Can I make these marshmallows without a stand mixer?
A: Yes, you can make these marshmallows with a hand mixer! It will require a bit more arm strength and time, but it is definitely achievable. Use a large bowl and whip the mixture on high speed for the same duration (8-10 minutes or until thick and glossy) using your hand mixer.
Q4: How long do sugar-free marshmallows last?
A: Homemade sugar-free marshmallows will last for about a week when stored in an airtight container at room temperature. They are best enjoyed within this timeframe for optimal texture and freshness. Avoid storing them in the refrigerator as this can make them slightly tougher.
Q5: Can I roast these sugar-free marshmallows?
A: Yes! These sugar-free marshmallows roast beautifully, just like traditional marshmallows. Skewer them and roast them over a campfire, grill, or stovetop until golden brown and slightly gooey for a delicious roasted treat.
Q6: Can I make flavored sugar-free marshmallows?
A: Absolutely! You can easily customize the flavor of these marshmallows by adding different extracts (like almond, peppermint, or lemon), citrus zest, spices (like cinnamon or nutmeg), or even a touch of sugar-free cocoa powder for chocolate marshmallows. Add these flavorings along with the vanilla extract.
Q7: Are these marshmallows keto-friendly?
A: Yes, these sugar-free marshmallows are generally considered keto-friendly, especially if made with erythritol or allulose, as they are very low in net carbs and contain no added sugar. However, always check the specific ingredients you use and consider your individual dietary needs and restrictions.
Q8: Can I double or halve this recipe?
A: Yes, you can easily double or halve this recipe. Simply adjust all ingredient quantities proportionally. When doubling, you may need a larger pan and potentially a slightly longer whipping time. When halving, you may need a smaller pan (adjust pan size to keep the marshmallow layer thickness similar).

Sugar-Free Marshmallows
Ingredients
Here’s what you’ll need to create these delectable sugar-free marshmallows. Don’t be intimidated by the ingredient list; most are pantry staples, and the process is surprisingly straightforward!
- Water (Cold): 1 cup, divided – Essential for blooming the gelatin and creating the syrup base. Cold water is crucial for proper gelatin hydration.
- Gelatin Powder (Unflavored): 3 tablespoons – The magic ingredient that gives marshmallows their signature bouncy, chewy texture. Make sure it’s unflavored for a pure marshmallow taste.
- Sweetener (Powdered Erythritol or Allulose): 1 ½ cups – Our sugar substitute! Powdered erythritol or allulose are excellent choices as they dissolve smoothly and provide a clean sweetness without any aftertaste. Powdered versions are preferred to avoid graininess.
- Water (Hot): ½ cup – Used to dissolve the sweetener and create a smooth syrup. Hot water ensures the sweetener dissolves completely and integrates seamlessly into the mixture.
- Vanilla Extract: 2 teaspoons – Adds that classic marshmallow flavor. Use pure vanilla extract for the best taste. You can also experiment with other extracts like almond or peppermint for variations.
- Salt: ¼ teaspoon – Enhances the sweetness and balances the overall flavor profile. Just a pinch is enough to make a difference.
- Optional: Powdered Sugar-Free Sweetener for Dusting: For coating the marshmallows and preventing stickiness. This is optional but highly recommended for easier handling and a more professional finish.
Instructions
Now for the fun part – making the marshmallows! Follow these detailed instructions carefully for marshmallow perfection.
- Bloom the Gelatin: In a heatproof bowl (like a stand mixer bowl or a large glass bowl), pour ½ cup of cold water. Sprinkle the gelatin powder evenly over the cold water. Let it sit undisturbed for 5-10 minutes. This process, called blooming, allows the gelatin to hydrate and properly activate, which is crucial for the marshmallow structure. You’ll notice the mixture becoming thick and jelly-like.
- Prepare the Sweetener Syrup: While the gelatin is blooming, combine the powdered sweetener and the remaining ½ cup of cold water in a saucepan. Stir well to ensure the sweetener is mostly dissolved. Place the saucepan over medium heat.
- Heat the Sweetener Mixture: Heat the sweetener mixture, stirring occasionally, until it comes to a simmer. You want the sweetener to fully dissolve and the mixture to become clear. Do not boil it vigorously. Once simmering, reduce the heat to low and gently simmer for about 5 minutes. This step further ensures the sweetener is completely dissolved and creates a slightly thickened syrup.
- Dissolve the Gelatin: Pour the hot sweetener syrup over the bloomed gelatin in the bowl. Immediately whisk the mixture vigorously until the gelatin is completely dissolved and the mixture is smooth. Continue whisking until the mixture becomes slightly cloudy and thickened. This step is crucial for incorporating the hot syrup with the gelatin and ensuring a homogenous mixture.
- Whip the Marshmallow Mixture: If using a stand mixer, attach the whisk attachment. Beat the mixture on medium-high speed for 8-10 minutes, or until the mixture becomes very thick, glossy white, and has increased significantly in volume. If using a hand mixer, use a large bowl and whisk on high speed for a similar duration. The mixture should resemble stiffly whipped egg whites and hold its shape. This whipping process incorporates air, giving the marshmallows their signature light and fluffy texture.
- Add Flavorings: Once the marshmallow mixture is thick and whipped, reduce the mixer speed to low and add the vanilla extract and salt. Mix until just combined. Be careful not to overmix at this stage.
- Prepare the Pan: While the mixture is whipping, lightly grease an 8×8 inch baking dish (or similar size) with coconut oil spray or a neutral oil. If desired, you can line the dish with parchment paper, leaving an overhang on the sides, for easier removal later. Dust the bottom and sides of the greased pan generously with powdered sugar-free sweetener to prevent sticking. This step is essential for easy marshmallow removal and prevents them from sticking to the pan.
- Pour into the Pan: Immediately pour the whipped marshmallow mixture into the prepared pan and spread it evenly with a spatula. Work quickly as the mixture will start to set relatively fast. Smooth the top as much as possible for a neat finish.
- Set the Marshmallows: Dust the top of the marshmallow mixture generously with more powdered sugar-free sweetener. This will create a protective layer and prevent stickiness as they set. Cover the pan loosely with plastic wrap or foil and refrigerate for at least 4-6 hours, or preferably overnight, to allow the marshmallows to fully set and firm up. This chilling time is crucial for the marshmallows to become solid and sliceable.
- Cut and Dust: Once the marshmallows are fully set, loosen the edges with a knife or spatula. If using parchment paper, lift the marshmallows out of the pan using the overhang. If not, carefully invert the pan onto a cutting board. Use a sharp knife or pizza cutter, dusted with powdered sugar-free sweetener, to cut the marshmallows into squares or desired shapes. Dust all sides of the marshmallows with more powdered sugar-free sweetener to prevent them from sticking together.
- Enjoy! Your homemade sugar-free marshmallows are now ready to enjoy! Store them in an airtight container at room temperature for up to a week.
Nutrition
- Serving Size: one normal portion
- Calories: 35
- Carbohydrates: 1g


