
Introduction
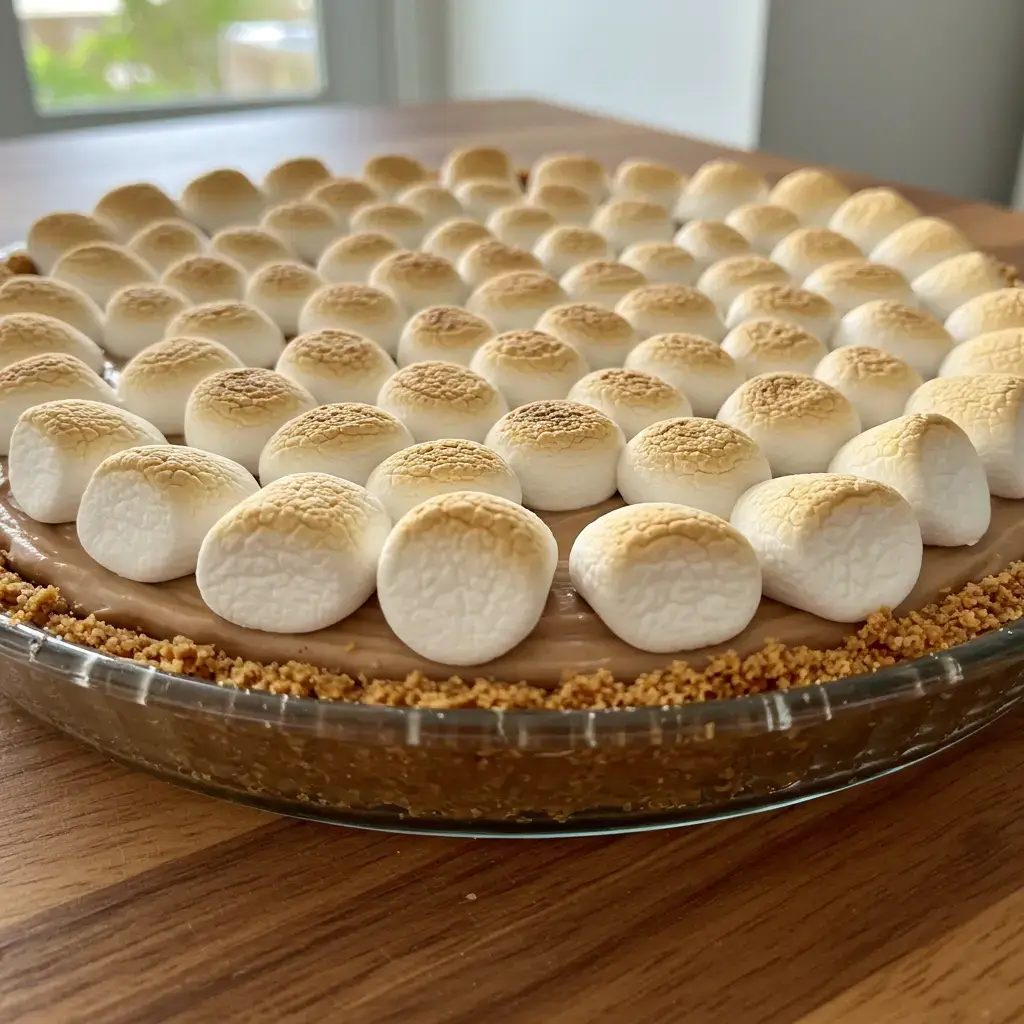
There’s something undeniably nostalgic about s’mores. These gooey, chocolatey, and marshmallow-laden treats evoke memories of campfires, laughter, and starry nights. But what if you could enjoy that same irresistible flavor in a new, exciting form? Enter the S’more Pie—a decadent dessert that combines the best of both worlds: the classic s’more and the beloved pie. With a creamy filling, a crunchy graham cracker crust, and a delightful marshmallow topping, this pie is sure to become a favorite in your dessert repertoire. In this guide, we’ll walk you through everything you need to know to create this delectable treat, step by step.
Ingredients
To create this indulgent S’more Pie, gather the following ingredients:
- 8 ounces cream cheese, softened
- 1-1/4 cups heavy cream
- 13 ounces chocolate hazelnut spread
- 9-inch graham cracker crust
- 3 cups mini marshmallows
Instructions
Creating a S’more Pie is simpler than you might think. Follow these step-by-step instructions to achieve the perfect pie:
- Prepare the Cream Mixture
- In a large bowl, beat the cream cheese and heavy cream together until the mixture becomes thick and smooth. This step ensures a creamy and luscious filling for your pie.
- Incorporate the Chocolate Hazelnut Spread
- Mix in the chocolate hazelnut spread until just combined. Be careful not to overmix, as this can alter the texture of your filling.
- Assemble the Pie
- Pour the prepared mixture into the graham cracker crust, spreading it evenly with a spatula to ensure a smooth surface.
- Chill the Pie
- Cover the pie and chill it in the fridge for at least 3 hours. This step is crucial to allow the flavors to meld and the filling to set properly.
- Add the Marshmallow Topping
- Before serving, top the pie with mini marshmallows, pressing them down lightly to ensure they adhere to the filling.
- Toast the Marshmallows
- For a classic toasted effect, briefly heat the marshmallows with a kitchen torch until golden brown, about 30-45 seconds. Be careful not to burn them, as they toast quickly.
Nutrition Facts
Understanding the nutritional content of your S’more Pie can help you enjoy it mindfully. Below are the approximate nutrition facts per slice (serves 8):
- Calories: 320
- Fat: 22g
- Carbohydrates: 28g
- Protein: 3g
How to Serve
Serving your S’more Pie can be just as enjoyable as the process of making it. The way you present and accompany this delightful dessert can elevate the experience for your guests and create lasting memories. Here are some detailed tips and creative ideas to enhance your dessert experience:
Presentation Matters
- Visual Appeal: The first impression is crucial. Consider using a decorative pie dish or a rustic cast-iron skillet to serve your S’more Pie. This not only adds charm but also creates a cozy, inviting atmosphere.
- Garnishing Techniques: Elevate the aesthetic of each slice by drizzling warm chocolate syrup over the top just before serving. This adds a glossy finish and a rich flavor that complements the pie’s sweetness. For an extra layer of texture, sprinkle crushed graham crackers on top, creating a delightful crunch that mirrors the pie’s crust. You can also use mini marshmallows lightly toasted with a culinary torch, giving each slice a campfire feel.
- Themed Serving: If you’re hosting a themed party, consider aligning your serving style with the theme. For example, at a camping-themed gathering, serve your slices on rustic wooden boards or slate tiles. For a more elegant affair, opt for white porcelain plates with delicate silver cutlery.
Pair It Well
- Ice Cream Options: A scoop of vanilla ice cream is a classic choice, but don’t hesitate to explore other flavors that can enhance your S’more Pie. Chocolate, caramel, or even a toasted marshmallow-flavored ice cream can add an exciting twist. For a gourmet touch, consider artisanal ice creams from local creameries.
- Whipped Cream Variations: Instead of plain whipped cream, experiment with flavored versions. Infuse your whipped cream with vanilla extract, or try adding a hint of cinnamon or cocoa powder for an unexpected flavor kick. For a festive touch, consider coloring your whipped cream with edible food coloring or using flavored syrups to create a visually striking topping.
- Fruit Accents: Fresh fruits can provide a refreshing contrast to the richness of the S’more Pie. Slices of strawberries, raspberries, or even banana can add a pop of flavor and color. You might also consider a fruit compote or sauce, such as raspberry or cherry, drizzled over the pie for a tangy complement.
Perfect for Any Occasion
- Versatile Dessert: One of the greatest attributes of S’more Pie is its versatility. Whether it’s a festive family gathering, a casual birthday party, or a summertime barbecue, this dessert fits seamlessly into any occasion. Tailor your serving style to match the event; for instance, slice the pie into smaller portions for a potluck or serve larger slices at a more formal gathering.
- Themed Events: For themed events such as a nostalgic movie night, serve the pie alongside popcorn and classic movie candies, creating a fun and whimsical dessert table. At a holiday gathering, consider adding seasonal touches like peppermint sprinkles or crushed candy canes for a festive twist.
- Interactive Serving: Engage your guests by creating a DIY S’mores station alongside the pie. Provide graham crackers, marshmallows, chocolate bars, and even flavored spreads like Nutella or peanut butter. This interactive element invites guests to customize their desserts and creates a fun, memorable experience for everyone involved.
- Leftover Considerations: If you find yourself with leftover S’more Pie, store it in an airtight container in the refrigerator. Serve cold or reheat individual slices in the microwave for a few seconds to enjoy that gooey, melty texture once again. Consider turning leftovers into a delicious breakfast treat by serving slices with a side of yogurt and fresh fruit.
By focusing on presentation, thoughtful pairings, and the versatility of your S’more Pie, you can create a dessert experience that delights both the eyes and the taste buds, ensuring that it becomes a highlight of any gathering.
Additional Tips
To ensure your S’more Pie is a resounding success, consider these additional tips that will elevate your dessert and make it as delightful as possible:
Soften the Cream Cheese:
Starting with room temperature cream cheese is essential for achieving that velvety, smooth consistency that defines a great S’more Pie. Cold cream cheese can lead to lumps in your filling, which can detract from the overall texture. To soften cream cheese quickly, you can cut it into small cubes and let it sit at room temperature for about 15-20 minutes. Alternatively, if you’re short on time, you can microwave it in 10-second intervals, ensuring it doesn’t melt. This step will help your filling blend seamlessly, making for a creamy and luscious pie.
Chill Thoroughly:
Chilling the pie is not just a suggestion; it’s a crucial step for ensuring that the filling sets properly. The cooling process allows the flavors to meld together while also ensuring that your pie holds its shape when sliced. To achieve the best results, aim to chill the pie for at least 4-6 hours, but for optimal texture and flavor, prepare it a day in advance. This extra time in the refrigerator allows the cream cheese and chocolate hazelnut spread to firm up, making each slice easier to serve. If you’re in a pinch, however, a shorter chilling period can work, but it may result in a less stable filling.
Avoid Overmixing:
When it comes to mixing the chocolate hazelnut spread into the cream cheese mixture, it’s essential to handle it gently. Overmixing can cause the filling to become overly airy, which may lead to a less dense and luxurious texture. Aim to mix just until the ingredients are combined—no more. This will ensure that your filling retains a rich, creamy consistency that complements the other elements of the pie. Use a spatula or a wooden spoon for folding; these tools can help you combine the ingredients without introducing too much air.
Torching Techniques:
A key element of any S’more is the toasted marshmallow topping, and achieving that perfect golden-brown color can be done in a couple of ways. If you have a kitchen torch, this is the best option for achieving a beautifully toasted finish. Hold the torch a few inches away from the surface of the marshmallows and move in a gentle, sweeping motion to ensure even toasting. If you don’t own a kitchen torch, don’t fret! You can achieve similar results by broiling the pie in the oven. Preheat your broiler and place the pie on the top rack. Keep a vigilant eye on it, as marshmallows can go from perfectly toasted to burnt in mere seconds. Once they reach your desired level of toastiness, remove the pie from the oven and let it cool slightly before serving.
Garnishing Suggestions:
To add a touch of elegance and extra flavor to your S’more Pie, consider garnishing it with additional toppings. A drizzle of melted chocolate or chocolate syrup can enhance the dessert’s visual appeal and provide a richer flavor. Crushed graham crackers sprinkled on top can add a delightful crunch, reminding everyone of the classic s’mores experience. For an unexpected twist, a sprinkle of sea salt can elevate the sweetness and balance the flavors beautifully.
Serving Suggestions:
When it comes time to serve your S’more Pie, consider pairing it with a scoop of vanilla ice cream or a dollop of whipped cream. The cold creaminess of ice cream contrasts wonderfully with the warmth of the toasted marshmallow topping. If you want to impress your guests further, serve the pie with a side of chocolate sauce for dipping. This not only enhances the overall flavor but also adds an interactive element to the dessert, making it more enjoyable for everyone.
By incorporating these detailed tips into your S’more Pie-making process, you can ensure that your dessert is not only visually stunning but also irresistibly delicious. Enjoy the process, and happy baking!
FAQs
To address any lingering questions you might have, here are some frequently asked questions about S’more Pie:
Q1: Can I use a different type of crust?
A1: Absolutely! While graham cracker crust is traditional, you can experiment with chocolate or digestive biscuit crusts for a unique twist.
Q2: What if I don’t have a kitchen torch?
A2: You can briefly place the pie under a broiler to toast the marshmallows. Just watch closely to prevent burning.
Q3: Can I make this pie in advance?
A3: Yes, you can prepare the pie up to two days in advance. Store it in the fridge, and add the marshmallow topping just before serving for optimal freshness.
Q4: Is there a substitute for chocolate hazelnut spread?
A4: If you don’t have chocolate hazelnut spread, you can use melted chocolate or chocolate ganache as an alternative.
Q5: How long will leftovers last?
A5: Store leftover pie in an airtight container in the fridge for up to 3-4 days. The marshmallows might lose their texture over time, but the pie will still taste delicious.
Conclusion
Creating a S’more Pie is not just about baking; it’s a delightful journey that transports you to campfire memories while embracing the sophistication of a dessert pie. This recipe marries the beloved flavors of a classic s’more—graham crackers, rich chocolate, and fluffy marshmallows—into a single, visually stunning dessert that is as pleasing to the palate as it is to the eye. The creamy filling, crunchy crust, and perfectly toasted marshmallow topping work in harmony to create a symphony of textures and flavors that will undoubtedly impress your family and friends.
By following our detailed guide, you will not only master the art of making S’more Pie but also gain valuable baking skills along the way. Each step we’ve outlined—from preparing the graham cracker crust to achieving the ideal consistency for the chocolate filling and toasting the marshmallows to perfection—is designed to ensure that your pie turns out beautifully every time. This pie is an excellent opportunity to practice essential baking techniques, like tempering chocolate and whipping egg whites, which can elevate your culinary repertoire.
As you gather your ingredients—whether it be artisanal chocolate, organic marshmallows, or homemade graham crackers—you’ll find that this process encourages creativity and experimentation. Feel free to customize your S’more Pie with different types of chocolate, such as dark, milk, or even white chocolate, or incorporate unique flavors like peanut butter or caramel to set your dessert apart. Adding a pinch of sea salt on top of the toasted marshmallows can also enhance the flavor profile, bringing a delightful contrast to the sweetness.
Moreover, the beauty of S’more Pie lies in its versatility. It’s perfect for a variety of occasions, from a summer barbecue to a cozy winter gathering. It can serve as a show-stopping centerpiece for special celebrations like birthdays or holidays, or simply as a comforting treat on a quiet evening at home. The pie can also be made ahead of time, allowing you to enjoy the moment with your guests without the stress of last-minute baking.
As you slice into the pie, you will be greeted by the luscious filling and the enticing aroma of toasted marshmallows, evoking feelings of nostalgia and warmth. Each bite of this delectable treat encapsulates the essence of childhood memories spent around a campfire, making it not just a dessert, but an experience to savor.
Whether you’re a seasoned baker or a novice in the kitchen, this S’more Pie promises to deliver a taste of nostalgia and indulgence with each slice. So, unleash your inner pastry chef, embrace the joy of baking, and take the time to savor every bite of this remarkable dessert. Your family and friends will surely appreciate the effort and creativity you’ve put into crafting this delightful pie, and it’s bound to become a cherished recipe in your household for years to come.


