

Oh my goodness, let me tell you about these Tiramisu Balls! I stumbled upon this recipe last week while desperately searching for a quick dessert to bring to a friend’s impromptu gathering. Frankly, I was short on time and even shorter on baking inspiration. Traditional tiramisu, while divine, felt like too much effort. Then, like a dessert angel descending from above, I found this recipe for Tiramisu Balls. “Quick and Easy” it promised, and boy, did it deliver! From start to finish, including chilling time, it was a breeze. And the taste? Absolutely incredible! The creamy mascarpone, the bold coffee flavor, the hint of cocoa – all perfectly balanced in a delightful bite-sized treat. My family devoured them in minutes, and even my notoriously picky nephew declared them “the best dessert ever!” Seriously, if you’re looking for a crowd-pleasing dessert that’s both impressive and effortless, look no further. These Quick and Easy Tiramisu Balls are your answer. Prepare to be amazed at how simple it is to create such a sophisticated and decadent treat.
Ingredients for Quick & Easy Tiramisu Balls
This recipe uses simple, readily available ingredients to create the classic tiramisu flavor in a fun, bite-sized form. Here’s what you’ll need:
- Ladyfingers (Savoiardi Biscuits): 200g – The essential sponge cookies that form the base of our tiramisu balls, providing a light and airy texture.
- Mascarpone Cheese: 250g – The heart of tiramisu, offering a rich, creamy, and slightly sweet flavor that’s simply irresistible.
- Heavy Cream (Whipping Cream): 120ml – Adds extra creaminess and lightness when whipped, creating a smooth and luscious filling.
- Espresso or Strong Coffee: 120ml, cooled – The signature flavor component of tiramisu, providing a bold and aromatic coffee kick. Ensure it’s cooled to prevent melting the mascarpone.
- Coffee Liqueur (Optional): 2 tablespoons – Enhances the coffee flavor and adds a touch of warmth and sophistication. You can omit this for an alcohol-free version or substitute with coffee extract.
- Granulated Sugar: 50g – Sweetens the mascarpone mixture, balancing the bitterness of the coffee and creating the perfect sweetness profile.
- Cocoa Powder (Unsweetened): For dusting – Adds a classic tiramisu finish, providing a slightly bitter counterpoint to the sweet filling and a beautiful visual appeal.
- Chocolate Shavings or Mini Chocolate Chips (Optional): For decoration – Adds a touch of extra indulgence and visual flair.
Instructions: How to Make Quick & Easy Tiramisu Balls
Making these Tiramisu Balls is surprisingly simple. Follow these step-by-step instructions to create these delightful treats in no time:
- Prepare the Ladyfingers: Begin by crushing the ladyfingers into fine crumbs. You can use a food processor for a quick and even crumb, or place them in a zip-top bag and crush them with a rolling pin. Aim for a consistency similar to coarse breadcrumbs. Don’t over-process them into a powder; you want some texture in your tiramisu balls. The ladyfinger crumbs form the structure and absorb the coffee flavor beautifully.
- Brew and Cool the Coffee: Brew strong espresso or coffee and allow it to cool completely. This is crucial! Hot coffee will melt the mascarpone cheese and ruin the texture of your filling. Cooling the coffee ensures that the mascarpone mixture remains thick and creamy. If you are using coffee liqueur, stir it into the cooled coffee now. This allows the flavors to meld together while you prepare the other components. The coffee is the key to that authentic tiramisu taste, so use a good quality coffee for the best results.
- Whip the Heavy Cream: In a medium-sized bowl, using an electric mixer or whisk, whip the heavy cream until stiff peaks form. This step adds lightness and airiness to the mascarpone mixture. Be careful not to overwhip, or you’ll end up with butter! You want firm, but still smooth, peaks. Stiff peaks mean that when you lift the whisk or beaters, the cream holds its shape and doesn’t immediately collapse back into itself.
- Combine Mascarpone and Sugar: In a separate large bowl, gently whisk together the mascarpone cheese and granulated sugar until smooth and creamy. Be gentle with the mascarpone; overmixing can make it grainy. You just want to combine the sugar evenly and create a smooth base for the rest of the ingredients. Taste the mixture at this stage and adjust the sugar if you prefer a sweeter or less sweet tiramisu.
- Incorporate Whipped Cream: Gently fold the whipped cream into the mascarpone mixture. Do this in two or three additions, folding carefully with a spatula. Folding is a gentle technique of combining ingredients without deflating the whipped cream. Use a figure-eight motion and scrape down the sides of the bowl to ensure everything is evenly incorporated. This step creates a light and airy mascarpone cream that is the hallmark of tiramisu.
- Add Coffee and Ladyfinger Crumbs: Gradually add the cooled coffee (and coffee liqueur, if using) to the mascarpone mixture, folding it in gently until just combined. Be careful not to overmix at this stage, as too much liquid can thin out the mixture. Next, add the crushed ladyfinger crumbs to the bowl. Gently fold the crumbs into the mascarpone-coffee mixture until they are evenly distributed. You want the crumbs to be coated in the creamy mixture but still retain some texture.
- Chill the Mixture: Cover the bowl with plastic wrap and refrigerate for at least 2 hours, or preferably overnight. Chilling is essential for firming up the mixture and allowing the flavors to meld and deepen. The ladyfinger crumbs will absorb the coffee and mascarpone mixture, creating that classic tiramisu texture. This chilling time also makes the mixture easier to roll into balls.
- Shape into Balls: Once chilled, the mixture should be firm enough to handle. Using a spoon or a small cookie scoop, scoop out portions of the mixture and gently roll them into balls. Aim for approximately 1-inch balls, but you can adjust the size according to your preference. If the mixture is still a little sticky, you can lightly dampen your hands with water to prevent sticking. Place the rolled balls on a baking sheet lined with parchment paper.
- Coat with Cocoa Powder: Place the cocoa powder in a shallow dish or bowl. Roll each tiramisu ball in the cocoa powder until it is evenly coated. The cocoa powder adds a beautiful visual contrast and a slightly bitter counterpoint to the sweetness of the tiramisu. Gently tap off any excess cocoa powder.
- Chill Again (Optional but Recommended): For best results, chill the cocoa-coated tiramisu balls for another 30 minutes before serving. This helps them firm up further and allows the cocoa powder to adhere better.
- Decorate (Optional): If desired, decorate the tiramisu balls with chocolate shavings, mini chocolate chips, or a dusting of powdered sugar before serving. This adds a final touch of elegance and visual appeal.
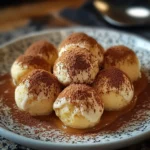
- Serve and Enjoy: Arrange the Tiramisu Balls on a serving platter and enjoy! They are best served chilled and are perfect for parties, gatherings, or a delightful dessert any time. Store any leftover Tiramisu Balls in an airtight container in the refrigerator.
Nutrition Facts for Quick & Easy Tiramisu Balls (per serving)
Please note that these are estimated nutrition facts and can vary slightly based on specific ingredient brands and portion sizes. This is based on a serving size of approximately 2 Tiramisu Balls (recipe yields about 20-24 balls, so roughly 10-12 servings).
- Serving Size: 2 Tiramisu Balls
- Calories: Approximately 200 kcal
- Total Fat: 14g
Disclaimer: Nutritional values are estimates and for informational purposes only.
Preparation Time for Quick & Easy Tiramisu Balls
These Tiramisu Balls live up to their “Quick & Easy” name! Here’s a breakdown of the preparation time:
- Active Preparation Time: Approximately 20-25 minutes. This includes crushing the ladyfingers, brewing coffee, whipping cream, and mixing all the ingredients together. The actual hands-on time is minimal, making it perfect for busy schedules.
- Chilling Time: Minimum 2 hours, ideally overnight. While this isn’t active time, it’s crucial for the recipe to set and for the flavors to develop fully. Plan ahead and factor in this chilling time.
- Rolling and Coating Time: Approximately 15-20 minutes. Rolling the balls and coating them in cocoa powder is a quick and easy process, especially if the mixture is well-chilled.
Total Time (excluding chilling): Around 35-45 minutes of active work.
Total Time (including chilling): Minimum 2 hours 35 minutes, ideally overnight plus 35-45 minutes.
Despite the chilling time, the active preparation is very short, making this a fantastic dessert to prepare ahead of time. You can easily make these the day before you need them, leaving you stress-free when it’s time to serve.
How to Serve Quick & Easy Tiramisu Balls
These versatile Tiramisu Balls can be served in various ways, making them perfect for any occasion, from casual gatherings to elegant dinner parties. Here are some serving suggestions:
- Classic Platter:
- Arrange the Tiramisu Balls on a beautiful platter.
- Dust the platter lightly with extra cocoa powder for a professional touch.
- Garnish with fresh berries like raspberries or strawberries for a pop of color and freshness.
- Add a few sprigs of mint for an elegant and aromatic garnish.
- Individual Dessert Cups:
- Place 2-3 Tiramisu Balls in small dessert cups or ramekins.
- Layer with a dollop of whipped cream or mascarpone cream for extra indulgence.
- Drizzle with a little coffee liqueur or chocolate syrup for added flavor and visual appeal.
- Party Skewers:
- Thread Tiramisu Balls onto small skewers or cocktail sticks.
- Alternate with fresh fruit like grapes, strawberries, or melon for a refreshing and fun presentation.
- This is perfect for parties and makes them easy to eat while mingling.
- Alongside Coffee or Dessert Wine:
- Serve Tiramisu Balls as a perfect accompaniment to a cup of freshly brewed coffee or espresso.
- Pair them with a dessert wine like Vin Santo or Moscato d’Asti for a sophisticated dessert experience.
- As Part of a Dessert Buffet:
- Include Tiramisu Balls as part of a dessert buffet alongside other sweet treats like cookies, brownies, and fruit tarts.
- Their bite-sized nature makes them ideal for a buffet setting, allowing guests to sample a variety of desserts.
- Frozen Treat (Tiramisu Truffles):
- For a colder treat, freeze the cocoa-coated Tiramisu Balls for about 30-60 minutes before serving. This will give them a truffle-like texture.
- Be mindful that freezing them for too long will make them very hard.
No matter how you choose to serve them, these Quick & Easy Tiramisu Balls are sure to be a hit! Their elegant appearance and delicious flavor make them a crowd-pleaser every time.
Additional Tips for Perfect Tiramisu Balls
To ensure your Tiramisu Balls are a resounding success, here are some helpful tips and tricks:
- Use High-Quality Mascarpone: Opt for good quality mascarpone cheese. The flavor of mascarpone is central to tiramisu, so using a high-quality brand will make a noticeable difference in the final taste. Fresh, creamy mascarpone is key to that authentic tiramisu richness.
- Don’t Overmix the Mascarpone: Be gentle when mixing the mascarpone cheese. Overmixing can cause it to become thin or grainy. Mix it just until smooth with the sugar, and then gently fold in the whipped cream. This ensures a light and airy texture.
- Adjust Coffee Strength to Taste: If you prefer a stronger coffee flavor, use espresso or very strong brewed coffee. You can also add a bit more coffee liqueur. For a milder flavor, use weaker coffee or reduce the amount of coffee liqueur. Taste as you go and adjust to your preference.
- Make them Ahead of Time: Tiramisu Balls are an excellent make-ahead dessert. They can be prepared a day or two in advance and stored in the refrigerator. In fact, the flavors often improve overnight as they meld together. This makes them perfect for entertaining.
- Experiment with Flavors: While classic tiramisu is delicious, feel free to experiment with variations. Try adding a hint of almond extract, vanilla extract, or even a pinch of cinnamon to the mascarpone mixture for a subtle flavor twist. You could also use flavored coffee for a different base.
- For Alcohol-Free Version: Simply omit the coffee liqueur. The Tiramisu Balls will still be delicious with just the coffee flavor. You can enhance the coffee flavor slightly by using a stronger brew or adding a teaspoon of coffee extract.
- Variations in Coating: While cocoa powder is classic, you can experiment with other coatings. Try rolling the balls in finely chopped nuts (like almonds or hazelnuts), shredded coconut, or even finely crushed ladyfinger crumbs for a different texture and flavor profile.
- Proper Chilling is Key: Don’t skip or shorten the chilling time. Chilling is crucial for firming up the mixture and making it easier to roll into balls. It also allows the ladyfingers to properly absorb the coffee and mascarpone mixture, resulting in the perfect tiramisu texture and flavor. Overnight chilling is highly recommended for optimal results.
By following these tips, you’ll be well on your way to creating perfect Quick & Easy Tiramisu Balls that are sure to impress everyone who tries them!
Frequently Asked Questions (FAQ) about Quick & Easy Tiramisu Balls
Here are some frequently asked questions about making Quick & Easy Tiramisu Balls, to help you troubleshoot and achieve dessert perfection:
Q1: Can I make these Tiramisu Balls without coffee liqueur?
A: Yes, absolutely! You can easily omit the coffee liqueur for an alcohol-free version. The Tiramisu Balls will still be delicious with just the coffee flavor. To compensate slightly for the missing liqueur, you could use a slightly stronger brew of coffee or add a tiny drop of coffee extract for a more intense coffee note.
Q2: Can I use instant coffee instead of brewed coffee?
A: While freshly brewed espresso or strong coffee is recommended for the best flavor, you can use strong instant coffee if you’re in a pinch. Dissolve a generous amount of instant coffee in hot water to create a strong coffee concentrate, and then allow it to cool completely before using in the recipe. However, for the most authentic tiramisu taste, freshly brewed is always preferable.
Q3: My mascarpone mixture is too soft to roll into balls. What did I do wrong?
A: The most likely reason for a soft mixture is that it wasn’t chilled long enough. Ensure you chill the mixture for at least 2 hours, or preferably overnight, in the refrigerator. Chilling firms up the mascarpone and ladyfinger mixture, making it easy to roll. If it’s still too soft after chilling, you may have added too much liquid (coffee or liqueur). In this case, you can try adding a bit more crushed ladyfinger crumbs to absorb some of the excess moisture and then chill again.
Q4: How long do Tiramisu Balls last in the refrigerator?
A: Tiramisu Balls will last for up to 3-4 days in the refrigerator when stored in an airtight container. In fact, they often taste even better the day after they are made as the flavors have had more time to meld together. Just be sure to keep them refrigerated to maintain their freshness and prevent any potential food safety issues.
Q5: Can I freeze Tiramisu Balls?
A: While technically you can freeze Tiramisu Balls, it’s not highly recommended as freezing can slightly alter the texture of the mascarpone. However, if you need to freeze them, do so after they are rolled and coated in cocoa powder. Place them in a single layer on a baking sheet lined with parchment paper and freeze until solid. Then, transfer them to an airtight container and freeze for up to 1 month. Thaw them in the refrigerator for a few hours before serving. Be aware that the texture might be slightly less creamy after thawing.
Q6: Can I make these Tiramisu Balls gluten-free?
A: To make gluten-free Tiramisu Balls, you need to substitute gluten-free ladyfingers. Fortunately, gluten-free ladyfingers are available in many specialty stores and online. Ensure all other ingredients are also gluten-free to maintain a completely gluten-free dessert. The rest of the recipe can be followed as written.
Q7: What can I use instead of ladyfingers?
A: Ladyfingers (Savoiardi biscuits) are traditional and provide the best texture for Tiramisu Balls. However, if you can’t find them, you can use other sponge cake or sponge cookies as a substitute. Pound cake or sponge cake, cut into cubes and lightly toasted, could work in a pinch, but ladyfingers are definitely recommended for the authentic texture and flavor absorption.
Q8: Can I double or triple this recipe?
A: Yes, you can easily double or triple this recipe to make a larger batch for a crowd. Simply multiply all the ingredient quantities by the desired factor. Just ensure you have a large enough bowl for mixing and enough refrigerator space for chilling the larger batch. Making a larger batch is perfect for parties or holidays when you need to serve a larger number of people.
Quick & Easy Tiramisu Balls
Ingredients
This recipe uses simple, readily available ingredients to create the classic tiramisu flavor in a fun, bite-sized form. Here’s what you’ll need:
- Ladyfingers (Savoiardi Biscuits): 200g – The essential sponge cookies that form the base of our tiramisu balls, providing a light and airy texture.
- Mascarpone Cheese: 250g – The heart of tiramisu, offering a rich, creamy, and slightly sweet flavor that’s simply irresistible.
- Heavy Cream (Whipping Cream): 120ml – Adds extra creaminess and lightness when whipped, creating a smooth and luscious filling.
- Espresso or Strong Coffee: 120ml, cooled – The signature flavor component of tiramisu, providing a bold and aromatic coffee kick. Ensure it’s cooled to prevent melting the mascarpone.
- Coffee Liqueur (Optional): 2 tablespoons – Enhances the coffee flavor and adds a touch of warmth and sophistication. You can omit this for an alcohol-free version or substitute with coffee extract.
- Granulated Sugar: 50g – Sweetens the mascarpone mixture, balancing the bitterness of the coffee and creating the perfect sweetness profile.
- Cocoa Powder (Unsweetened): For dusting – Adds a classic tiramisu finish, providing a slightly bitter counterpoint to the sweet filling and a beautiful visual appeal.
- Chocolate Shavings or Mini Chocolate Chips (Optional): For decoration – Adds a touch of extra indulgence and visual flair.
Instructions
Making these Tiramisu Balls is surprisingly simple. Follow these step-by-step instructions to create these delightful treats in no time:
- Prepare the Ladyfingers: Begin by crushing the ladyfingers into fine crumbs. You can use a food processor for a quick and even crumb, or place them in a zip-top bag and crush them with a rolling pin. Aim for a consistency similar to coarse breadcrumbs. Don’t over-process them into a powder; you want some texture in your tiramisu balls. The ladyfinger crumbs form the structure and absorb the coffee flavor beautifully.
- Brew and Cool the Coffee: Brew strong espresso or coffee and allow it to cool completely. This is crucial! Hot coffee will melt the mascarpone cheese and ruin the texture of your filling. Cooling the coffee ensures that the mascarpone mixture remains thick and creamy. If you are using coffee liqueur, stir it into the cooled coffee now. This allows the flavors to meld together while you prepare the other components. The coffee is the key to that authentic tiramisu taste, so use a good quality coffee for the best results.
- Whip the Heavy Cream: In a medium-sized bowl, using an electric mixer or whisk, whip the heavy cream until stiff peaks form. This step adds lightness and airiness to the mascarpone mixture. Be careful not to overwhip, or you’ll end up with butter! You want firm, but still smooth, peaks. Stiff peaks mean that when you lift the whisk or beaters, the cream holds its shape and doesn’t immediately collapse back into itself.
- Combine Mascarpone and Sugar: In a separate large bowl, gently whisk together the mascarpone cheese and granulated sugar until smooth and creamy. Be gentle with the mascarpone; overmixing can make it grainy. You just want to combine the sugar evenly and create a smooth base for the rest of the ingredients. Taste the mixture at this stage and adjust the sugar if you prefer a sweeter or less sweet tiramisu.
- Incorporate Whipped Cream: Gently fold the whipped cream into the mascarpone mixture. Do this in two or three additions, folding carefully with a spatula. Folding is a gentle technique of combining ingredients without deflating the whipped cream. Use a figure-eight motion and scrape down the sides of the bowl to ensure everything is evenly incorporated. This step creates a light and airy mascarpone cream that is the hallmark of tiramisu.
- Add Coffee and Ladyfinger Crumbs: Gradually add the cooled coffee (and coffee liqueur, if using) to the mascarpone mixture, folding it in gently until just combined. Be careful not to overmix at this stage, as too much liquid can thin out the mixture. Next, add the crushed ladyfinger crumbs to the bowl. Gently fold the crumbs into the mascarpone-coffee mixture until they are evenly distributed. You want the crumbs to be coated in the creamy mixture but still retain some texture.
- Chill the Mixture: Cover the bowl with plastic wrap and refrigerate for at least 2 hours, or preferably overnight. Chilling is essential for firming up the mixture and allowing the flavors to meld and deepen. The ladyfinger crumbs will absorb the coffee and mascarpone mixture, creating that classic tiramisu texture. This chilling time also makes the mixture easier to roll into balls.
- Shape into Balls: Once chilled, the mixture should be firm enough to handle. Using a spoon or a small cookie scoop, scoop out portions of the mixture and gently roll them into balls. Aim for approximately 1-inch balls, but you can adjust the size according to your preference. If the mixture is still a little sticky, you can lightly dampen your hands with water to prevent sticking. Place the rolled balls on a baking sheet lined with parchment paper.
- Coat with Cocoa Powder: Place the cocoa powder in a shallow dish or bowl. Roll each tiramisu ball in the cocoa powder until it is evenly coated. The cocoa powder adds a beautiful visual contrast and a slightly bitter counterpoint to the sweetness of the tiramisu. Gently tap off any excess cocoa powder.
- Chill Again (Optional but Recommended): For best results, chill the cocoa-coated tiramisu balls for another 30 minutes before serving. This helps them firm up further and allows the cocoa powder to adhere better.
- Decorate (Optional): If desired, decorate the tiramisu balls with chocolate shavings, mini chocolate chips, or a dusting of powdered sugar before serving. This adds a final touch of elegance and visual appeal.
- Serve and Enjoy: Arrange the Tiramisu Balls on a serving platter and enjoy! They are best served chilled and are perfect for parties, gatherings, or a delightful dessert any time. Store any leftover Tiramisu Balls in an airtight container in the refrigerator.
Nutrition
- Serving Size: one normal portion
- Calories: 200
- Fat: 14g


