
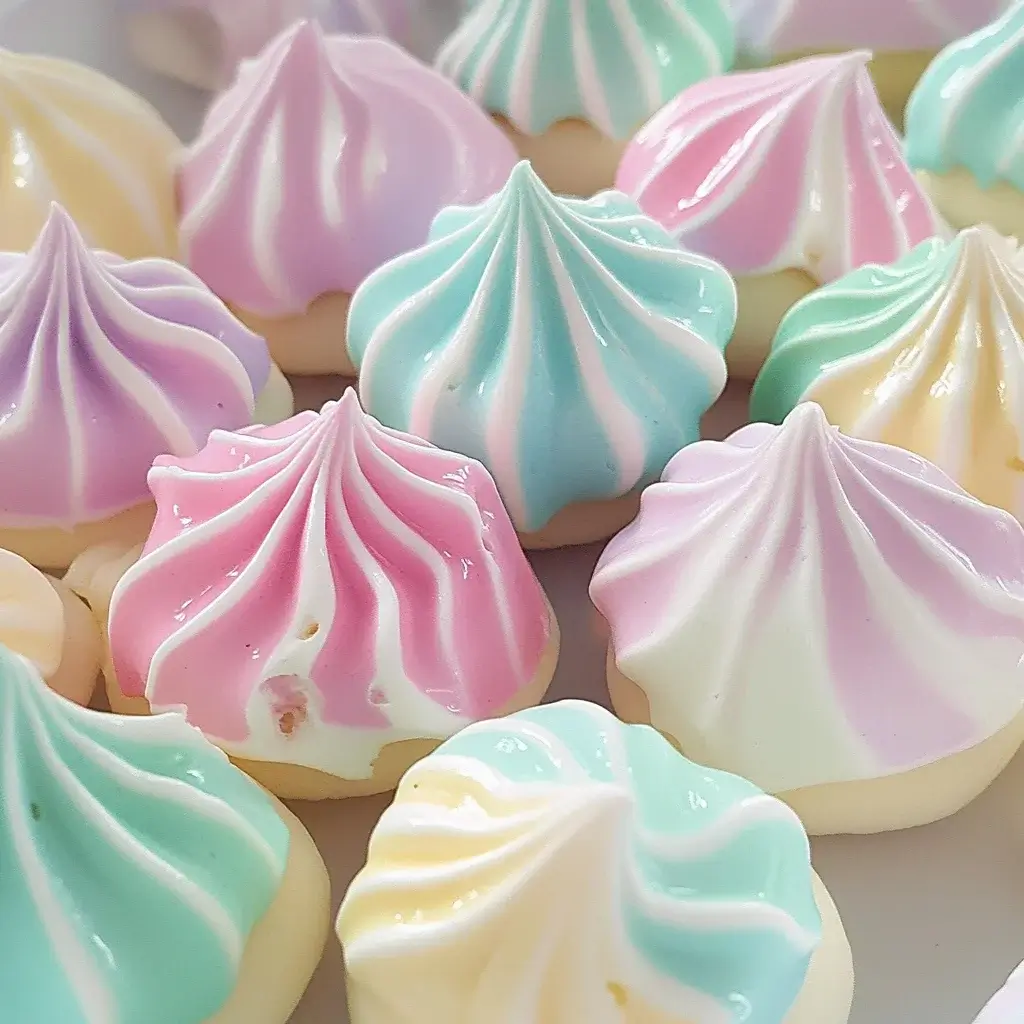
Pastel Meringue Kisses are a delightful treat that has become a firm favorite in our home. Every time I bake a batch, the kitchen fills with a sweet, delicate aroma that’s simply irresistible. My kids adore them, and honestly, so do I! There’s something so satisfying about the crisp, airy texture that melts in your mouth, leaving behind a subtle sweetness. These meringue kisses are not just delicious; they’re also incredibly pretty, especially when tinted in soft pastel shades. Perfect for parties, holidays, or just a sweet afternoon snack, Pastel Meringue Kisses are surprisingly easy to make and always bring a touch of joy to any occasion.
Ingredients
- Egg Whites: 4 large, at room temperature. The foundation of our meringue, egg whites provide the structure and airy texture.
- Granulated Sugar: 1 cup, superfine if possible. Sugar sweetens and stabilizes the meringue, contributing to its glossy finish.
- Cream of Tartar: ¼ teaspoon. This acid helps to stabilize the egg whites and create a firmer meringue.
- Vanilla Extract: 1 teaspoon. Adds a delicate flavor that complements the sweetness of the meringue.
- Gel Food Coloring: Pastel shades (pink, blue, yellow, green, lavender). Gel food coloring is preferred over liquid as it provides vibrant color without adding excess liquid, which can affect the meringue’s consistency.
Instructions
- Prepare Your Equipment and Preheat Oven: Preheat your oven to 200°F (95°C). Line baking sheets with parchment paper or silicone baking mats. Ensure your mixing bowl and whisk are spotlessly clean and grease-free. Even a tiny bit of grease can prevent egg whites from whipping properly. Wiping your bowl and whisk with lemon juice or vinegar can help ensure they are clean.
- Whip the Egg Whites: In a large, clean mixing bowl, add the room temperature egg whites and cream of tartar. Using an electric mixer (stand mixer or hand mixer), beat the egg whites on medium speed until soft peaks form. Soft peaks are when the whites form peaks that gently fold over when you lift the whisk. This usually takes about 2-3 minutes.
- Gradually Add Sugar: With the mixer running on medium speed, gradually add the granulated sugar, one tablespoon at a time. It’s crucial to add the sugar slowly to allow it to fully dissolve into the egg whites and create a stable meringue. Continue beating until stiff, glossy peaks form. Stiff peaks are when the whites stand straight up when you lift the whisk and hold their shape firmly. The mixture should look shiny and smooth, and when you rub a bit of it between your fingers, you shouldn’t feel any sugar granules. This step might take another 5-7 minutes.
- Incorporate Vanilla Extract and Color: Once stiff peaks have formed, add the vanilla extract and mix until just combined. If you wish to create pastel-colored meringue kisses, divide the meringue into separate bowls (one for each color you want to use). Add a tiny drop of gel food coloring to each bowl and gently fold it in using a spatula until you achieve your desired pastel shade. Remember, gel food coloring is concentrated, so start with a very small amount and add more gradually to reach the perfect pastel hue. Avoid overmixing at this stage, as it can deflate the meringue.
- Pipe the Meringue Kisses: Transfer the meringue into piping bags fitted with a star tip (such as Wilton 1M or similar) for a classic meringue kiss shape, or use a round tip for simple drops. Pipe small kisses onto the prepared baking sheets, about 1-1.5 inches in diameter and about 1 inch apart. Hold the piping bag straight up, apply even pressure, and then lift and swirl the tip to create a pointed top. If you don’t have piping bags, you can use a zip-top bag with a corner snipped off, or even just spoon small mounds of meringue onto the baking sheets for a more rustic look.
- Bake the Meringue Kisses: Bake in the preheated oven for 60-90 minutes, or until the meringues are dry and crisp. The baking time will depend on the size of your meringue kisses and your oven. Meringues should be baked at a low temperature for a longer time to dry out completely without browning. They are done when they are easily lifted off the parchment paper without sticking and sound hollow when tapped gently on the bottom. If they are still sticky, they need more baking time.
- Cool Completely: Turn off the oven and leave the meringue kisses inside with the oven door slightly ajar for another 30-60 minutes to cool down completely. This slow cooling process helps prevent cracking and ensures they are thoroughly dried. Once completely cool, gently peel them off the parchment paper.
- Store Properly: Store the Pastel Meringue Kisses in an airtight container at room temperature. Meringues are very sensitive to moisture, so keep them in a dry place. They will keep well for up to 2 weeks if stored properly.
Nutrition Facts
Servings: Approximately 48 meringue kisses
Calories per serving: Approximately 25-30 calories per meringue kiss (depending on size)
Approximate Nutrition Facts per Meringue Kiss (estimated and can vary based on size and specific ingredients):
- Calories: 25-30 kcal
- Total Fat: 0g
Please note: These are estimates and can vary based on specific ingredients and portion sizes. Meringues are primarily made of sugar and egg whites, making them low in fat and protein but relatively high in sugar for their size.
Preparation Time
Prep time: 20-25 minutes (includes gathering ingredients, preparing equipment, and whipping meringue).
Bake time: 60-90 minutes (depending on oven and meringue size).
Cooling time: 60-120 minutes (oven cooling + room temperature cooling).
Total time: Approximately 2 hours 40 minutes – 3 hours 35 minutes (including cooling time).
While the total time seems long, most of it is hands-off baking and cooling time. Active preparation is relatively short, making these Pastel Meringue Kisses a manageable baking project.
How to Serve
Pastel Meringue Kisses are incredibly versatile and can be served in numerous delightful ways. Their delicate sweetness and crisp texture make them a perfect addition to various occasions and desserts.
- Standalone Sweet Treat: Enjoy them on their own as a light and airy dessert. They are perfect for satisfying a sweet craving without being too heavy.
- Party Favors: Package them in small cellophane bags tied with pastel ribbons for charming and edible party favors. They are ideal for birthdays, baby showers, bridal showers, and holiday celebrations.
- Dessert Table Centerpiece: Arrange them on a tiered dessert stand or platter to create a visually stunning centerpiece for your dessert table. The pastel colors add an elegant and festive touch.
- Cake and Cupcake Decorations: Use them to decorate cakes and cupcakes. Their light weight means they won’t sink into frosting, and they add a lovely textural contrast. Place them on top of frosting swirls or create borders around cakes.
- Ice Cream or Yogurt Topping: Crumble them over ice cream or yogurt for added sweetness and a delightful crunch. They pair especially well with vanilla, fruit, or chocolate flavors.
- Hot Chocolate or Coffee Garnish: Float a meringue kiss on top of a mug of hot chocolate or coffee for a whimsical and sweet garnish. They will slowly melt, adding a subtle sweetness to your drink.
- Fruit Salad Accompaniment: Serve them alongside a fresh fruit salad to add a touch of sweetness and texture. The crisp meringue contrasts beautifully with juicy fruits.
- Layered Desserts (Parfaits or Trifle): Incorporate them into layered desserts like parfaits or trifles. Their crispness provides a textural element against creamy layers of pudding, custard, or whipped cream.
- Gift Giving: Package them in decorative boxes or jars to create a thoughtful homemade gift for friends, family, or neighbors. Especially lovely during holidays like Easter or Christmas.
Additional Tips for Perfect Pastel Meringue Kisses
Achieving perfect Pastel Meringue Kisses is all about attention to detail and understanding the nuances of meringue making. Here are eight essential tips to ensure your meringues are light, crisp, and beautifully pastel.
- Use Room Temperature Egg Whites: Room temperature egg whites whip up to a greater volume than cold egg whites. Take your eggs out of the refrigerator at least 30 minutes to an hour before you plan to start baking. This simple step makes a significant difference in the meringue’s volume and stability.
- Ensure Utensils are Grease-Free: Grease is the enemy of meringue. Even a tiny amount of grease can prevent egg whites from whipping properly. Make sure your mixing bowl, whisk, and any other utensils that will come into contact with the egg whites are spotlessly clean and completely free of grease. Wiping them down with lemon juice or white vinegar before starting can help remove any residual grease.
- Use Superfine Sugar (Optional but Recommended): Superfine sugar, also known as caster sugar, dissolves more easily into the egg whites than granulated sugar, resulting in a smoother, glossier meringue. If you don’t have superfine sugar, you can pulse granulated sugar in a food processor for a few seconds to make it finer.
- Add Sugar Gradually: Don’t dump all the sugar in at once. Add it gradually, one tablespoon at a time, while the mixer is running. This allows the sugar to fully dissolve into the egg whites and helps create a stable and glossy meringue. Rushing this step can result in a grainy or weeping meringue.
- Don’t Overmix After Adding Color: Once you’ve added the gel food coloring, fold it in gently until just combined. Overmixing at this stage can deflate the meringue and make it less airy. Aim for a uniform pastel color without losing volume.
- Bake at a Low Temperature for a Long Time: Meringues are dried, not baked. Baking them at a low temperature for a longer period allows them to dry out completely without browning or cracking. Stick to the recommended temperature of 200°F (95°C) and be patient.
- Test for Doneness: Meringues are done when they are easily lifted off the parchment paper without sticking and sound hollow when tapped on the bottom. If they stick or feel soft, they need more baking time. Err on the side of baking them longer rather than underbaking.
- Cool Slowly in the Oven: After baking, turn off the oven and leave the meringues inside with the door slightly ajar to cool down gradually. This slow cooling process prevents cracking due to temperature shock and ensures they are thoroughly dried and crisp. Resist the urge to take them out immediately.
FAQ Section: Your Pastel Meringue Kiss Questions Answered
Q1: Can I make meringue kisses ahead of time?
A: Yes, absolutely! Meringue kisses are perfect for making ahead of time. Once baked and completely cooled, store them in an airtight container at room temperature. They will stay crisp and delicious for up to 2 weeks, making them ideal for party prep or holiday baking.
Q2: Why are my meringues cracking?
A: Cracking can occur due to a few reasons. The most common is baking at too high a temperature. Ensure your oven temperature is accurate and not exceeding 200°F (95°C). Another reason can be rapid temperature changes. Avoid opening the oven door frequently during baking and allow the meringues to cool slowly in the oven after baking.
Q3: My meringue is weeping (liquid is seeping out). What did I do wrong?
A: Weeping meringue is often caused by undermixing the egg whites or not dissolving the sugar completely. Make sure you beat the egg whites to stiff, glossy peaks and add the sugar gradually, allowing it to fully dissolve. Another factor could be humidity. Meringues are hygroscopic, meaning they absorb moisture from the air. If you live in a humid climate, bake meringues on a dry day and store them in a very airtight container with a desiccant packet if possible.
Q4: Can I use liquid food coloring instead of gel food coloring?
A: While you can use liquid food coloring, gel food coloring is highly recommended for meringues. Liquid food coloring can add excess liquid to the meringue, which can affect its consistency and make it less stable. Gel food coloring is more concentrated and adds color without altering the meringue’s texture.
Q5: Can I make meringue kisses without cream of tartar?
A: Yes, you can make meringues without cream of tartar, but it does help stabilize the egg whites and create a firmer meringue. If you don’t have cream of tartar, you can substitute it with a pinch of salt or a teaspoon of lemon juice or white vinegar. These acidic ingredients also help stabilize the egg whites.
Q6: My meringue kisses are sticky, not crisp. What happened?
A: Sticky meringues are usually underbaked. They need to be baked long enough at a low temperature to dry out completely. If your meringues are sticky, return them to the oven (at 200°F/95°C) for another 15-30 minutes, checking for doneness every 15 minutes. Ensure they are completely cool before storing, as they can also become sticky if they are still warm when placed in an airtight container.
Q7: Can I flavor my meringue kisses with something other than vanilla extract?
A: Absolutely! You can experiment with different extracts and flavorings. Almond extract, peppermint extract, lemon extract, or even a pinch of citrus zest can add delightful variations to your meringue kisses. Add flavorings after the meringue has reached stiff peaks, just before coloring.
Q8: How do I prevent my meringue kisses from browning?
A: Browning indicates the oven temperature is too high. Ensure your oven is set to 200°F (95°C) and consider using an oven thermometer to verify the accuracy of your oven’s temperature. If your oven tends to run hot, you may need to lower the temperature slightly. Baking at a low temperature and for a longer time is key to drying out the meringues without browning them.
Print
Pastel Meringue Kisses
Ingredients
- Egg Whites: 4 large, at room temperature. The foundation of our meringue, egg whites provide the structure and airy texture.
- Granulated Sugar: 1 cup, superfine if possible. Sugar sweetens and stabilizes the meringue, contributing to its glossy finish.
- Cream of Tartar: ¼ teaspoon. This acid helps to stabilize the egg whites and create a firmer meringue.
- Vanilla Extract: 1 teaspoon. Adds a delicate flavor that complements the sweetness of the meringue.
- Gel Food Coloring: Pastel shades (pink, blue, yellow, green, lavender). Gel food coloring is preferred over liquid as it provides vibrant color without adding excess liquid, which can affect the meringue’s consistency.
Instructions
- Prepare Your Equipment and Preheat Oven: Preheat your oven to 200°F (95°C). Line baking sheets with parchment paper or silicone baking mats. Ensure your mixing bowl and whisk are spotlessly clean and grease-free. Even a tiny bit of grease can prevent egg whites from whipping properly. Wiping your bowl and whisk with lemon juice or vinegar can help ensure they are clean.
- Whip the Egg Whites: In a large, clean mixing bowl, add the room temperature egg whites and cream of tartar. Using an electric mixer (stand mixer or hand mixer), beat the egg whites on medium speed until soft peaks form. Soft peaks are when the whites form peaks that gently fold over when you lift the whisk. This usually takes about 2-3 minutes.
- Gradually Add Sugar: With the mixer running on medium speed, gradually add the granulated sugar, one tablespoon at a time. It’s crucial to add the sugar slowly to allow it to fully dissolve into the egg whites and create a stable meringue. Continue beating until stiff, glossy peaks form. Stiff peaks are when the whites stand straight up when you lift the whisk and hold their shape firmly. The mixture should look shiny and smooth, and when you rub a bit of it between your fingers, you shouldn’t feel any sugar granules. This step might take another 5-7 minutes.
- Incorporate Vanilla Extract and Color: Once stiff peaks have formed, add the vanilla extract and mix until just combined. If you wish to create pastel-colored meringue kisses, divide the meringue into separate bowls (one for each color you want to use). Add a tiny drop of gel food coloring to each bowl and gently fold it in using a spatula until you achieve your desired pastel shade. Remember, gel food coloring is concentrated, so start with a very small amount and add more gradually to reach the perfect pastel hue. Avoid overmixing at this stage, as it can deflate the meringue.
- Pipe the Meringue Kisses: Transfer the meringue into piping bags fitted with a star tip (such as Wilton 1M or similar) for a classic meringue kiss shape, or use a round tip for simple drops. Pipe small kisses onto the prepared baking sheets, about 1-1.5 inches in diameter and about 1 inch apart. Hold the piping bag straight up, apply even pressure, and then lift and swirl the tip to create a pointed top. If you don’t have piping bags, you can use a zip-top bag with a corner snipped off, or even just spoon small mounds of meringue onto the baking sheets for a more rustic look.
- Bake the Meringue Kisses: Bake in the preheated oven for 60-90 minutes, or until the meringues are dry and crisp. The baking time will depend on the size of your meringue kisses and your oven. Meringues should be baked at a low temperature for a longer time to dry out completely without browning. They are done when they are easily lifted off the parchment paper without sticking and sound hollow when tapped gently on the bottom. If they are still sticky, they need more baking time.
- Cool Completely: Turn off the oven and leave the meringue kisses inside with the oven door slightly ajar for another 30-60 minutes to cool down completely. This slow cooling process helps prevent cracking and ensures they are thoroughly dried. Once completely cool, gently peel them off the parchment paper.
- Store Properly: Store the Pastel Meringue Kisses in an airtight container at room temperature. Meringues are very sensitive to moisture, so keep them in a dry place. They will keep well for up to 2 weeks if stored properly.
Nutrition
- Serving Size: one normal portion
- Calories: 30
- Fat: 0g


