
Let me tell you, there’s something truly magical about the scent of citrus baking in the oven, especially on a gloomy afternoon. Recently, I stumbled upon this incredibly easy lemon bars recipe, and let me just say, it has become an instant family favorite. From the moment the tangy aroma filled my kitchen, I knew we were in for a treat. The kids, usually picky eaters, devoured them in minutes, and my husband, a self-proclaimed dessert connoisseur, declared them the perfect balance of sweet and tart. These lemon bars are not just easy to make; they are sunshine in a square, guaranteed to brighten up any day and leave everyone reaching for seconds. If you are looking for a simple yet impressive dessert that will wow your family and friends, look no further – this is it!
Ingredients for the Easiest Lemon Bars You’ll Ever Make
- All-Purpose Flour: The foundation of both the shortbread crust and the lemon filling. Provides structure and a tender crumb.
- Unsalted Butter: Cold and cubed for the crust, melted for the filling. Adds richness, flavor, and flakiness to the crust and moisture to the filling.
- Powdered Sugar: Used in the crust for sweetness and a delicate texture. Also used in the filling to create a smooth, sweet base.
- Granulated Sugar: Sweetens the lemon filling and balances the tartness of the lemon juice.
- Large Eggs: Bind the lemon filling together, adding richness and structure.
- Fresh Lemon Juice: The star ingredient! Provides the signature tangy lemon flavor. Freshly squeezed is highly recommended for the best taste.
- Lemon Zest: Adds a concentrated burst of lemon flavor and aroma. Use only the yellow part of the peel, avoiding the bitter white pith.
- Baking Powder: A leavening agent that helps the lemon filling rise slightly and become light and airy.
- Salt: Enhances the flavors of all the other ingredients and balances the sweetness.
Step-by-Step Instructions for Perfect Lemon Bars
- Preheat Your Oven and Prepare the Pan: Start by preheating your oven to 350°F (175°C). This ensures the oven is at the correct temperature when you put the lemon bars in, leading to even baking. While the oven is preheating, grease and line an 8×8 inch baking pan with parchment paper. Leave an overhang of parchment on the sides; this will act as handles later, making it incredibly easy to lift the finished lemon bars out of the pan for cutting. Greasing the pan ensures the parchment paper sticks and prevents the crust from sticking to the pan in any uncovered areas.
- Make the Shortbread Crust Dough: In a large mixing bowl, whisk together the all-purpose flour, powdered sugar, and salt. Whisking ensures these dry ingredients are evenly combined before adding the butter, which is crucial for a consistent crust texture. Add the cold, cubed unsalted butter to the dry ingredients. Using a pastry blender or your fingertips, cut the butter into the flour mixture until it resembles coarse crumbs. The goal is to break down the butter into smaller pieces and coat them with flour, which will create a flaky crust when baked. If using your fingertips, work quickly to prevent the butter from getting too warm.
- Press the Crust into the Pan: Pour the crumbly dough into the prepared baking pan. Using your fingers or the bottom of a measuring cup, firmly press the dough evenly into the bottom of the pan. Ensure the crust is uniform in thickness so it bakes evenly. Pressing it firmly will create a solid base for the lemon filling.
- Bake the Crust (First Bake): Place the pan in the preheated oven and bake for 18-20 minutes, or until the crust is lightly golden brown around the edges. Baking the crust separately before adding the filling prevents a soggy bottom and ensures the crust is fully cooked and crisp. Keep an eye on it; ovens vary, and you want it lightly golden, not overly browned.
- Prepare the Lemon Filling: While the crust is baking, prepare the lemon filling. In a separate large mixing bowl, whisk together the granulated sugar, eggs, fresh lemon juice, lemon zest, baking powder, and a pinch of salt. Whisk until the mixture is smooth and well combined, ensuring the sugar is fully dissolved and the eggs are thoroughly incorporated. The baking powder in the filling contributes to a slightly airy and tender texture. The lemon zest should be finely grated to release its oils and maximize the lemon flavor.
- Pour the Filling Over the Hot Crust: Once the crust is lightly golden and slightly firm to the touch, remove it from the oven. Immediately pour the lemon filling evenly over the hot, pre-baked crust. Pouring the filling onto a hot crust helps it set properly and prevents the crust from becoming soggy. Spread the filling gently to ensure it reaches all corners of the pan.
- Bake Again (Second Bake): Return the pan to the oven and bake for another 20-25 minutes, or until the lemon filling is set and no longer jiggly in the center. The edges of the filling should be slightly golden, and the center should be set but still have a slight jiggle if you gently shake the pan. Be careful not to overbake, as this can make the lemon filling tough.
- Cool Completely: Remove the lemon bars from the oven and let them cool completely in the pan on a wire rack. This is crucial! The lemon filling needs time to set properly as it cools. Cooling at room temperature is best, but you can speed up the process by placing them in the refrigerator once they are mostly cooled.
- Chill in the Refrigerator (Optional but Recommended): For cleaner cuts and a firmer texture, refrigerate the lemon bars for at least 2 hours, or even better, overnight. Chilling allows the lemon filling to fully set and firm up, making them easier to slice and serve.
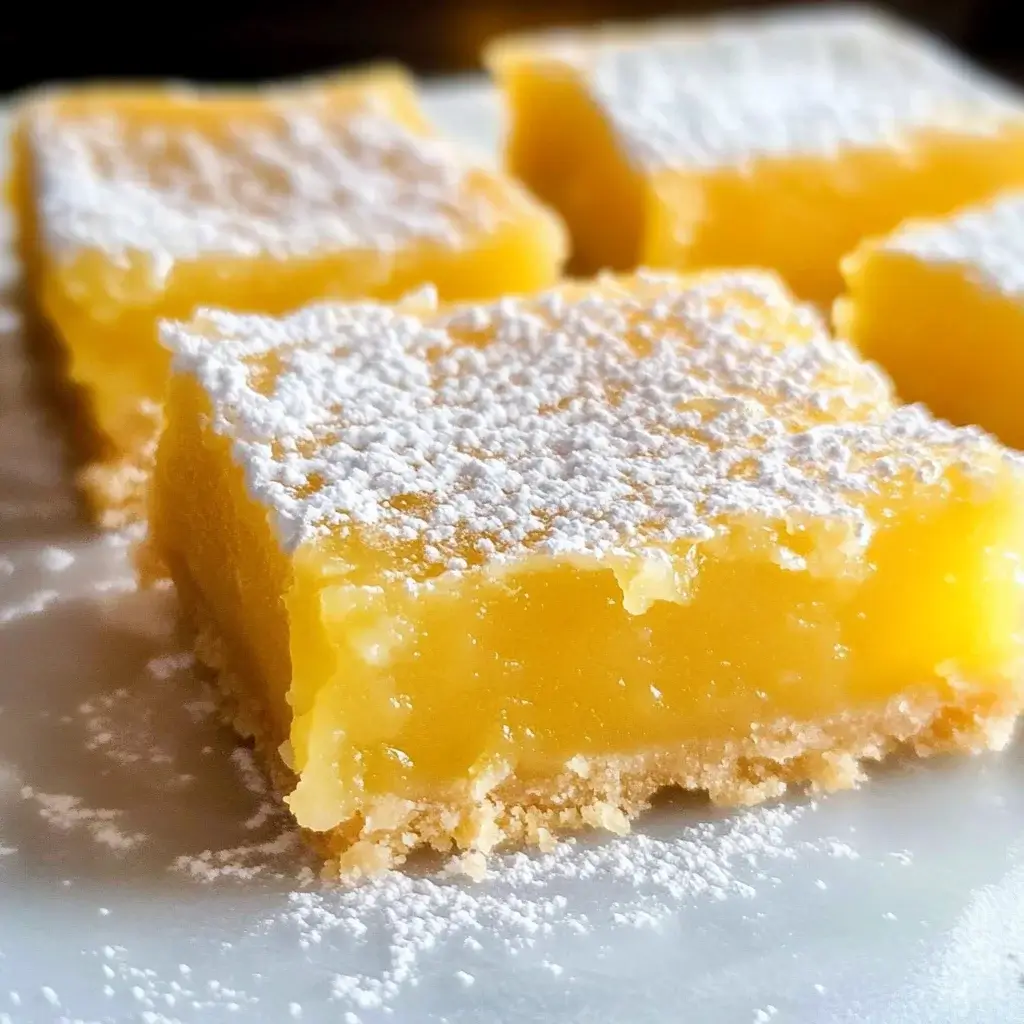
- Cut and Dust with Powdered Sugar: Once fully cooled and chilled, lift the lemon bars out of the pan using the parchment paper overhang. Place them on a cutting board and cut them into squares or bars using a sharp knife. For clean cuts, you can wipe the knife clean between each slice, especially if the bars are still slightly sticky. Dust generously with powdered sugar just before serving for a beautiful finish and an added touch of sweetness. The powdered sugar also helps to balance the tartness of the lemon.
- Serve and Enjoy! These easy lemon bars are now ready to be served and enjoyed. They are perfect for dessert, afternoon tea, picnics, or any occasion that calls for a bright and refreshing treat. Store leftover lemon bars in an airtight container in the refrigerator for up to 3-4 days.
Nutrition Facts for Easy Lemon Bars (per serving)
(Note: Nutritional information is an estimate and can vary based on specific ingredients and serving sizes.)
- Servings: Approximately 16 servings (based on an 8×8 inch pan cut into 16 squares)
- Calories per serving: Approximately 200-250 calories
- Fat: 10-12g
(These values are approximate and for informational purposes only. For precise nutritional information, use a nutrition calculator with the specific brands and quantities of ingredients used.)
Preparation Time Breakdown for Lemon Bar Bliss
- Prep Time: 20 minutes (This includes gathering ingredients, making the crust dough, and mixing the lemon filling. The recipe is designed to be quick and efficient, minimizing active preparation time.)
- Bake Time: 40-45 minutes (This is divided into two baking stages: 18-20 minutes for the crust alone and 20-25 minutes for the crust and filling together. Baking times may slightly vary depending on your oven.)
- Cooling Time: Minimum 2 hours (Ideally longer, even overnight. This is passive time where the lemon bars set and chill, crucial for texture and ease of cutting. While technically “cooling time,” it’s mostly hands-off.)
- Total Time: Approximately 2 hours and 20 minutes (This is an estimate from start to finish, including active prep, baking, and the minimum cooling time. Factor in extra cooling time for best results.)
How to Serve Your Delicious Lemon Bars
- Classic Dessert: Serve lemon bars as a simple and satisfying dessert after lunch or dinner. They are a perfect light and refreshing end to any meal.
- Afternoon Tea Treat: Pair lemon bars with a cup of hot tea or coffee for a delightful afternoon treat. Their bright citrus flavor complements both black tea and herbal infusions.
- Picnic Perfect: Lemon bars are portable and hold up well at room temperature for a few hours, making them ideal for picnics, potlucks, and outdoor gatherings.
- Party Platter: Arrange lemon bars on a platter alongside other desserts like brownies, cookies, or fruit tarts for a beautiful and varied dessert spread at parties.
- Garnish with Fresh Fruit: Elevate your presentation by serving lemon bars with fresh berries like raspberries, blueberries, or strawberries. The tartness of the berries complements the lemon flavor beautifully.
- Whipped Cream or Yogurt: For an extra touch of indulgence, serve lemon bars with a dollop of lightly sweetened whipped cream or Greek yogurt. This adds a creamy texture and balances the tartness.
- Lemon Curd Swirl (For Extra Lemon Lovers): For an intense lemon experience, swirl a little lemon curd on top of the filling before the second bake or drizzle it over the cooled bars before serving.
- Dust with Different Toppings: Instead of just powdered sugar, experiment with other toppings like shredded coconut, chopped nuts (almonds, pistachios), or even a sprinkle of sea salt for a sweet and salty contrast.
Additional Tips for Lemon Bar Perfection
- Use Freshly Squeezed Lemon Juice and Zest: Bottled lemon juice simply cannot compare to the bright, vibrant flavor of freshly squeezed lemon juice. Similarly, fresh lemon zest provides essential oils that significantly enhance the lemony aroma and taste. Always zest your lemons before juicing them for easier handling.
- Don’t Overbake the Filling: Overbaked lemon filling can become tough and rubbery. Bake just until the edges are set and the center is no longer jiggly but still has a slight wobble. Carryover cooking will continue to set the filling as it cools.
- Let the Crust Cool Slightly Before Adding Filling (Optional): While pouring the filling onto a hot crust is generally recommended, some bakers prefer to let the crust cool for 5-10 minutes after the first bake before adding the filling. This can help prevent the edges of the crust from over-browning during the second bake. Experiment to see which method you prefer.
- Use Cold Butter for the Crust: Cold butter is crucial for creating a flaky shortbread crust. Keep the butter cold right up until you cut it into the flour mixture. Cold butter creates pockets of steam during baking, resulting in a tender, flaky texture.
- Don’t Overmix the Crust Dough: Overmixing the crust dough can develop the gluten in the flour, resulting in a tough crust. Mix just until the dough comes together and resembles coarse crumbs. Pressing it into the pan, rather than rolling, also helps maintain tenderness.
- Adjust Sweetness to Your Preference: If you prefer a tarter lemon bar, you can slightly reduce the amount of granulated sugar in the filling. Conversely, if you like them sweeter, you can add a tablespoon or two more of sugar. Taste the filling before baking and adjust accordingly.
- For Extra Zesty Flavor, “Bloom” the Zest: To maximize the lemon zest flavor, you can “bloom” it by rubbing the lemon zest with the granulated sugar in the filling mixture before adding the other wet ingredients. This helps release the oils from the zest and infuses the sugar with lemon flavor.
- Use a Sharp Knife and Warm Water for Clean Cuts: To get those picture-perfect lemon bar squares, use a sharp knife and dip it in warm water between each cut. Wipe the knife clean after each dip. This prevents the sticky filling from clinging to the knife and ensures clean, even slices.
Frequently Asked Questions About Easy Lemon Bars
Q1: Can I use bottled lemon juice instead of fresh?
A: While you can use bottled lemon juice in a pinch, freshly squeezed lemon juice is highly recommended for the best flavor. Bottled juice often lacks the bright, vibrant taste of fresh lemons and can sometimes have a slightly metallic aftertaste. Fresh lemon juice will make a noticeable difference in the overall quality of your lemon bars.
Q2: Can I make lemon bars ahead of time?
A: Absolutely! Lemon bars are a great make-ahead dessert. In fact, chilling them in the refrigerator is actually beneficial as it allows the filling to fully set and makes them easier to cut. You can make lemon bars up to 2-3 days in advance and store them covered in the refrigerator. They are often even better the next day as the flavors have had time to meld.
Q3: Can I freeze lemon bars?
A: Yes, lemon bars freeze very well! To freeze, cut the cooled lemon bars into squares and arrange them in a single layer on a baking sheet lined with parchment paper. Freeze for about 1-2 hours until solid. Then, transfer them to an airtight container or freezer bag, placing parchment paper between layers to prevent sticking. They can be frozen for up to 2-3 months. Thaw in the refrigerator overnight or at room temperature for about an hour before serving. Dust with fresh powdered sugar after thawing.
Q4: My lemon bars are too tart. How can I fix this?
A: If your lemon bars are too tart for your liking, you can try a few things. Next time, reduce the amount of lemon juice slightly or increase the granulated sugar in the filling. You can also serve them with a sweeter topping like whipped cream or a dusting of extra powdered sugar to balance the tartness. If they are already baked and too tart, unfortunately, there isn’t much you can do to change the flavor of the bars themselves, but serving them with a sweet accompaniment will help.
Q5: Why is my lemon bar filling runny or not setting properly?
A: There are a few reasons why your lemon bar filling might be runny. Firstly, ensure you are baking them for the correct amount of time. Underbaking is a common cause. Also, make sure your oven temperature is accurate. Oven thermometers are helpful for this. Secondly, ensure you are using the correct ratios of ingredients, especially eggs and lemon juice – too much liquid or too few eggs can result in a runny filling. Finally, cooling them completely, especially in the refrigerator, is essential for the filling to fully set.
Q6: Can I use a different size pan for this recipe?
A: Yes, you can adapt this recipe to different pan sizes, but you will need to adjust the baking time accordingly. For a 9×13 inch pan, you will likely need to increase the recipe by 1.5 or even double it, and baking time may need to be slightly reduced. For a smaller pan, like a 9×9 inch, you can halve the recipe. Keep an eye on the bars while baking and adjust time as needed to ensure they are properly set and golden brown.
Q7: Can I add other flavors to these lemon bars?
A: Absolutely! Lemon bars are a great base for flavor variations. You can add other citrus zests like orange or lime for a citrus medley. For a berry lemon bar, swirl in some raspberry or blueberry jam into the filling before baking. A sprinkle of lavender or rosemary in the crust or filling can add a sophisticated herbal note. Get creative and experiment with your favorite flavor combinations!
Q8: Why is my crust soggy?
A: A soggy crust is usually caused by the filling seeping into the crust. Pre-baking the crust before adding the filling is crucial to prevent this. Make sure you bake the crust until it is lightly golden and slightly firm before pouring in the lemon filling. Also, ensure you are not overfilling the pan with the lemon mixture, as too much liquid can contribute to a soggy crust. Finally, cooling the bars completely allows the filling to set and helps prevent moisture from making the crust soggy.

Easy Lemon Bars Recipe
Ingredients
- All-Purpose Flour: The foundation of both the shortbread crust and the lemon filling. Provides structure and a tender crumb.
- Unsalted Butter: Cold and cubed for the crust, melted for the filling. Adds richness, flavor, and flakiness to the crust and moisture to the filling.
- Powdered Sugar: Used in the crust for sweetness and a delicate texture. Also used in the filling to create a smooth, sweet base.
- Granulated Sugar: Sweetens the lemon filling and balances the tartness of the lemon juice.
- Large Eggs: Bind the lemon filling together, adding richness and structure.
- Fresh Lemon Juice: The star ingredient! Provides the signature tangy lemon flavor. Freshly squeezed is highly recommended for the best taste.
- Lemon Zest: Adds a concentrated burst of lemon flavor and aroma. Use only the yellow part of the peel, avoiding the bitter white pith.
- Baking Powder: A leavening agent that helps the lemon filling rise slightly and become light and airy.
- Salt: Enhances the flavors of all the other ingredients and balances the sweetness.
Instructions
- Preheat Your Oven and Prepare the Pan: Start by preheating your oven to 350°F (175°C). This ensures the oven is at the correct temperature when you put the lemon bars in, leading to even baking. While the oven is preheating, grease and line an 8×8 inch baking pan with parchment paper. Leave an overhang of parchment on the sides; this will act as handles later, making it incredibly easy to lift the finished lemon bars out of the pan for cutting. Greasing the pan ensures the parchment paper sticks and prevents the crust from sticking to the pan in any uncovered areas.
- Make the Shortbread Crust Dough: In a large mixing bowl, whisk together the all-purpose flour, powdered sugar, and salt. Whisking ensures these dry ingredients are evenly combined before adding the butter, which is crucial for a consistent crust texture. Add the cold, cubed unsalted butter to the dry ingredients. Using a pastry blender or your fingertips, cut the butter into the flour mixture until it resembles coarse crumbs. The goal is to break down the butter into smaller pieces and coat them with flour, which will create a flaky crust when baked. If using your fingertips, work quickly to prevent the butter from getting too warm.
- Press the Crust into the Pan: Pour the crumbly dough into the prepared baking pan. Using your fingers or the bottom of a measuring cup, firmly press the dough evenly into the bottom of the pan. Ensure the crust is uniform in thickness so it bakes evenly. Pressing it firmly will create a solid base for the lemon filling.
- Bake the Crust (First Bake): Place the pan in the preheated oven and bake for 18-20 minutes, or until the crust is lightly golden brown around the edges. Baking the crust separately before adding the filling prevents a soggy bottom and ensures the crust is fully cooked and crisp. Keep an eye on it; ovens vary, and you want it lightly golden, not overly browned.
- Prepare the Lemon Filling: While the crust is baking, prepare the lemon filling. In a separate large mixing bowl, whisk together the granulated sugar, eggs, fresh lemon juice, lemon zest, baking powder, and a pinch of salt. Whisk until the mixture is smooth and well combined, ensuring the sugar is fully dissolved and the eggs are thoroughly incorporated. The baking powder in the filling contributes to a slightly airy and tender texture. The lemon zest should be finely grated to release its oils and maximize the lemon flavor.
- Pour the Filling Over the Hot Crust: Once the crust is lightly golden and slightly firm to the touch, remove it from the oven. Immediately pour the lemon filling evenly over the hot, pre-baked crust. Pouring the filling onto a hot crust helps it set properly and prevents the crust from becoming soggy. Spread the filling gently to ensure it reaches all corners of the pan.
- Bake Again (Second Bake): Return the pan to the oven and bake for another 20-25 minutes, or until the lemon filling is set and no longer jiggly in the center. The edges of the filling should be slightly golden, and the center should be set but still have a slight jiggle if you gently shake the pan. Be careful not to overbake, as this can make the lemon filling tough.
- Cool Completely: Remove the lemon bars from the oven and let them cool completely in the pan on a wire rack. This is crucial! The lemon filling needs time to set properly as it cools. Cooling at room temperature is best, but you can speed up the process by placing them in the refrigerator once they are mostly cooled.
- Chill in the Refrigerator (Optional but Recommended): For cleaner cuts and a firmer texture, refrigerate the lemon bars for at least 2 hours, or even better, overnight. Chilling allows the lemon filling to fully set and firm up, making them easier to slice and serve.
- Cut and Dust with Powdered Sugar: Once fully cooled and chilled, lift the lemon bars out of the pan using the parchment paper overhang. Place them on a cutting board and cut them into squares or bars using a sharp knife. For clean cuts, you can wipe the knife clean between each slice, especially if the bars are still slightly sticky. Dust generously with powdered sugar just before serving for a beautiful finish and an added touch of sweetness. The powdered sugar also helps to balance the tartness of the lemon.
- Serve and Enjoy! These easy lemon bars are now ready to be served and enjoyed. They are perfect for dessert, afternoon tea, picnics, or any occasion that calls for a bright and refreshing treat. Store leftover lemon bars in an airtight container in the refrigerator for up to 3-4 days.
Nutrition
- Serving Size: one normal portion
- Calories: 250
- Fat: 12g


