
There are few desserts that evoke the comforting nostalgia of homemade chocolate pudding. For me, it’s a taste that transports me straight back to childhood, to cozy evenings and the simple joys of a sweet treat. Recently, craving that very feeling, I decided to whip up a batch of this incredibly easy chocolate pudding recipe. Let me tell you, it was a resounding success! From the moment the rich, chocolatey aroma filled my kitchen, I knew we were in for a treat. My kids, usually picky eaters, devoured it with gusto, their faces smeared with chocolatey goodness and wide smiles. Even my husband, a self-proclaimed dessert skeptic, couldn’t resist a second helping. This recipe is truly a winner – simple enough for a weeknight dessert, yet decadent enough to impress guests. It’s rich, creamy, intensely chocolatey, and best of all, it comes together in minutes with ingredients you likely already have in your pantry. Get ready to experience chocolate pudding perfection – homemade and effortlessly delicious!
Ingredients for the Perfect Chocolate Pudding
Here’s what you’ll need to create this luscious chocolate pudding:
- Granulated Sugar: Provides the perfect level of sweetness and helps to balance the bitterness of the cocoa powder.
- Unsweetened Cocoa Powder: The heart of the chocolate flavor! Use a good quality cocoa powder for the richest, most intense chocolate taste. Dutch-processed cocoa will yield a darker, smoother pudding, while natural cocoa will offer a slightly more acidic and fruity note.
- Cornstarch: The thickening agent that gives the pudding its signature creamy texture. It’s crucial for achieving that perfect spoon-licking consistency.
- Salt: Just a pinch! Salt enhances the flavors and balances the sweetness, preventing the pudding from tasting one-dimensional.
- Whole Milk: The base of our pudding, providing richness and creaminess. You can substitute with 2% milk for a slightly lighter version, but whole milk delivers the best texture.
- Heavy Cream: Adds an extra layer of luxuriousness and richness to the pudding. It contributes to a smoother, more decadent final product.
- Vanilla Extract: Enhances the chocolate flavor and adds a touch of warmth and complexity. Use pure vanilla extract for the best flavor, avoiding imitation vanilla.
- Semi-Sweet Chocolate Chips (optional): For an extra boost of chocolate intensity and a smoother, richer texture. These melt into the pudding, adding depth and indulgence.
Step-by-Step Instructions for Homemade Chocolate Pudding
Follow these simple steps to create your own batch of irresistible chocolate pudding:
- Combine Dry Ingredients: In a medium saucepan, whisk together the granulated sugar, unsweetened cocoa powder, cornstarch, and salt. Make sure to whisk thoroughly to eliminate any lumps of cocoa powder or cornstarch. This step is crucial for ensuring a smooth, lump-free pudding.
- Gradually Whisk in Milk: Slowly pour in the whole milk, whisking continuously to incorporate it smoothly into the dry ingredients. Continue whisking until the mixture is completely smooth and there are no clumps of dry ingredients remaining at the bottom of the pan. This gradual addition of milk helps prevent lumps from forming.
- Cook Over Medium Heat: Place the saucepan over medium heat and cook, stirring constantly with a whisk or a heatproof spatula. It’s important to stir continuously to prevent the pudding from scorching on the bottom of the pan and to ensure even thickening.
- Bring to a Simmer and Thicken: Continue cooking and stirring until the mixture begins to simmer and thicken. You’ll notice the pudding transitioning from a thin, milky consistency to a noticeably thicker texture. This usually takes about 5-7 minutes. Don’t rush this step; allow the cornstarch to fully activate and thicken the pudding properly.
- Simmer for One Minute: Once the pudding has thickened and is simmering gently, continue to cook and stir for one minute more. This ensures that the cornstarch is fully cooked and eliminates any starchy taste. The pudding should be thick enough to coat the back of a spoon at this stage.
- Remove from Heat and Stir in Cream, Vanilla, and Chocolate Chips (optional): Take the saucepan off the heat. Immediately stir in the heavy cream and vanilla extract. If using chocolate chips, add them now as well. Stir until the cream and vanilla are fully incorporated and the chocolate chips, if used, are completely melted and the pudding is smooth and glossy. The residual heat of the pudding will melt the chocolate chips beautifully.
- Pour into Serving Dishes: Pour the hot chocolate pudding into individual serving dishes or a single large bowl. If you prefer a skin-free pudding, press a piece of plastic wrap directly onto the surface of each pudding while it cools. This prevents a skin from forming on top.
- Chill in Refrigerator: Refrigerate the pudding for at least 2-3 hours, or preferably overnight, to allow it to fully chill and set. Chilling not only firms up the pudding to its desired consistency but also allows the flavors to meld and deepen, resulting in an even more delicious dessert.
- Serve and Enjoy: Once chilled, your homemade chocolate pudding is ready to be served! Enjoy it plain, or with your favorite toppings (see serving suggestions below). The pudding will thicken further as it chills, reaching a perfect, spoonable consistency.
Nutrition Facts for Easy Chocolate Pudding
(Per Serving, approximate, based on 6 servings. Nutritional values can vary based on specific ingredients and serving size.)
- Servings: 6
- Calories per serving: Approximately 250-300 calories
- Total Fat: 12-15g
Please note: These values are estimates and for informational purposes only. For precise nutritional information, use a nutrition calculator with the specific brands and amounts of ingredients used.
Preparation Time for Homemade Chocolate Pudding
This easy chocolate pudding recipe is wonderfully quick to prepare!
- Prep Time: 5 minutes (measuring ingredients and combining dry ingredients)
- Cook Time: 10-12 minutes (cooking and thickening the pudding on the stovetop)
- Chill Time: Minimum 2-3 hours (for the pudding to set and chill in the refrigerator)
- Total Time (excluding chill time): Approximately 15-17 minutes
This recipe is perfect for those moments when you need a delicious dessert in a hurry! Most of the time is hands-off chilling time, making it a great make-ahead option.
How to Serve Your Delicious Chocolate Pudding
Chocolate pudding is delightful on its own, but it’s also fantastic with a variety of toppings and accompaniments. Here are some serving suggestions to elevate your pudding experience:
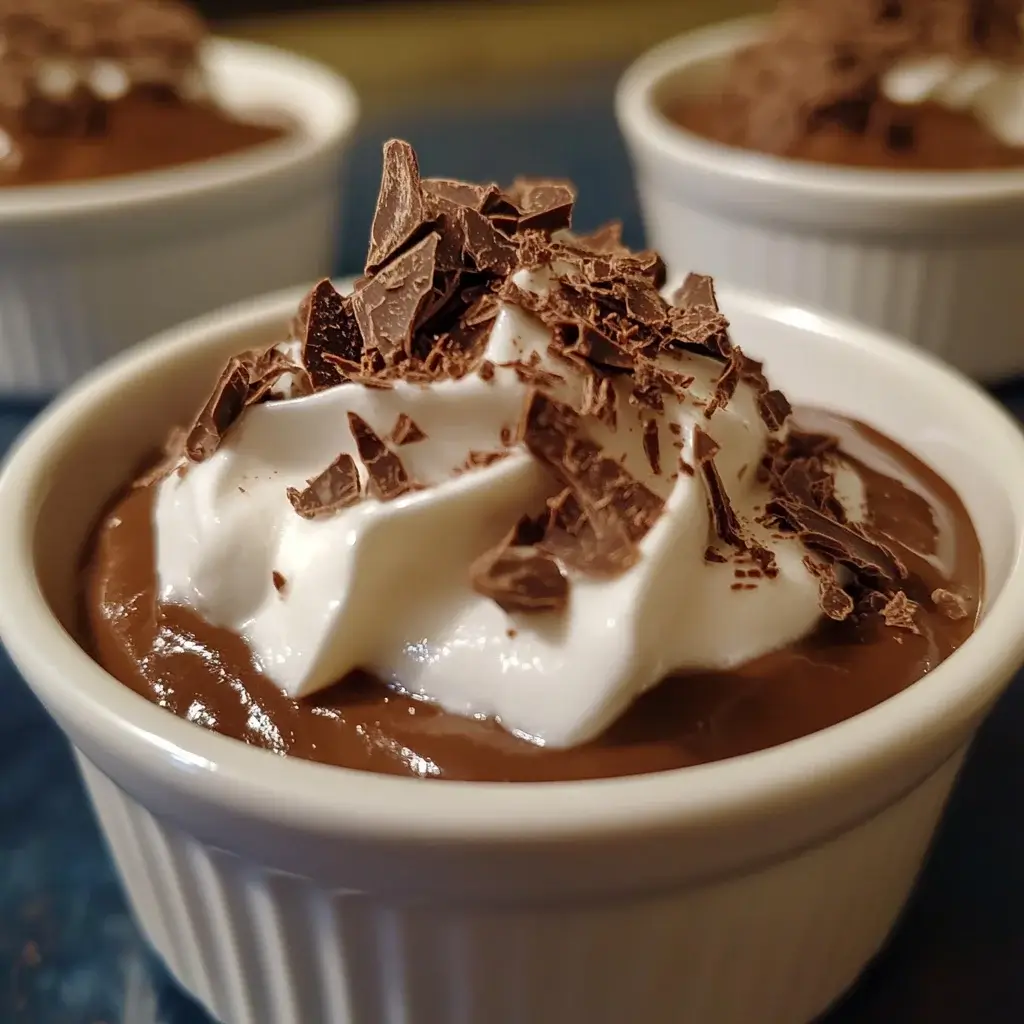
- Whipped Cream: A classic pairing! A dollop of freshly whipped cream adds lightness and a touch of extra sweetness that complements the rich chocolate perfectly.
- Chocolate Shavings: For an extra touch of elegance and intensified chocolate flavor, sprinkle some chocolate shavings on top. Use a vegetable peeler to create beautiful curls from a bar of good quality chocolate.
- Fresh Berries: The bright acidity of fresh berries like raspberries, strawberries, or blueberries cuts through the richness of the pudding and adds a burst of freshness and color.
- Sprinkles: Fun and festive! Sprinkles are a kid-friendly favorite and add a playful touch to your pudding. Chocolate sprinkles, rainbow sprinkles, or even seasonal sprinkles work wonderfully.
- Chopped Nuts: Add a crunchy texture and nutty flavor with chopped nuts like walnuts, pecans, almonds, or hazelnuts. Toasted nuts offer an even richer flavor.
- Caramel Sauce: Drizzle a generous amount of caramel sauce over your pudding for a decadent and indulgent treat. The combination of chocolate and caramel is always a winner.
- Mint Sprig: A simple sprig of fresh mint adds a touch of freshness and visual appeal to your pudding. The subtle mint flavor also complements the chocolate nicely.
- Cookies or Biscotti: Serve your pudding alongside crunchy cookies like chocolate wafers, shortbread, or biscotti for dipping and added texture.
Get creative and experiment with different toppings to find your favorite combination!
Additional Tips for Perfect Homemade Chocolate Pudding
Follow these tips to ensure your chocolate pudding turns out perfectly every time:
- Use Good Quality Cocoa Powder: The quality of your cocoa powder significantly impacts the flavor of your pudding. Opt for a good quality unsweetened cocoa powder for the best chocolate taste. Dutch-processed cocoa will result in a darker, smoother, and less bitter pudding, while natural cocoa will offer a slightly brighter, more acidic flavor. Choose according to your preference.
- Whisk Thoroughly: Make sure to whisk the dry ingredients together very well before adding the milk. This step is essential to prevent lumps in your pudding. Ensure there are no clumps of cocoa powder or cornstarch before you begin cooking.
- Stir Constantly While Cooking: Continuous stirring is crucial while cooking the pudding. This prevents scorching on the bottom of the pan and ensures even thickening. Use a whisk or a heatproof spatula and scrape the bottom and sides of the pan as you stir.
- Don’t Overcook: Once the pudding has thickened and come to a simmer, don’t overcook it. Simmering for just one minute is sufficient to cook the cornstarch. Overcooking can make the pudding too thick or even cause it to break down.
- Adjust Sweetness to Taste: This recipe provides a balanced sweetness, but you can adjust it to your preference. If you prefer a less sweet pudding, reduce the amount of sugar slightly. For a sweeter pudding, you can add a bit more sugar. Taste the pudding before adding the vanilla and cream and adjust accordingly.
- For a Richer Pudding, Add More Chocolate: If you want an even more intense chocolate flavor, increase the amount of cocoa powder by a tablespoon or two. You can also add more semi-sweet chocolate chips, or even use dark chocolate chips for a deeper, richer chocolate experience.
- Prevent Skin Formation: To prevent a skin from forming on the surface of your pudding as it cools, press a piece of plastic wrap directly onto the surface of the hot pudding in each serving dish. This creates an airtight seal and prevents skin from forming. Remove the plastic wrap once the pudding is chilled.
- Make it Vegan (Dairy-Free): To make this pudding vegan, substitute the whole milk and heavy cream with plant-based alternatives. Use unsweetened almond milk, soy milk, or oat milk instead of whole milk. For the heavy cream, use full-fat coconut cream (the solid part from a chilled can of full-fat coconut milk) or a vegan heavy cream alternative. Ensure your chocolate chips are also dairy-free if using them.
Frequently Asked Questions About Easy Chocolate Pudding
Here are some common questions and answers about making homemade chocolate pudding:
Q1: Can I use a different type of milk?
A1: Yes, you can substitute whole milk with 2% milk for a slightly lighter pudding. However, whole milk provides the richest and creamiest texture. For dairy-free options, you can use unsweetened almond milk, soy milk, or oat milk.
Q2: Can I use Dutch-processed cocoa powder instead of natural cocoa powder?
A2: Absolutely! Dutch-processed cocoa powder will result in a darker, smoother, and less bitter pudding. Natural cocoa powder will yield a slightly more acidic and fruity flavor. Both work well, so choose based on your preference.
Q3: Can I make chocolate pudding without cornstarch?
A3: Cornstarch is the primary thickening agent in this recipe. While you can try using other thickeners like tapioca starch or arrowroot starch, cornstarch is generally the most effective for achieving the classic pudding texture. Using flour is not recommended as it can lead to a less smooth and potentially grainy texture.
Q4: How long does homemade chocolate pudding last in the refrigerator?
A4: Properly stored in an airtight container in the refrigerator, homemade chocolate pudding will last for 3-4 days. It’s best enjoyed within this timeframe for optimal flavor and texture.
Q5: Can I freeze chocolate pudding?
A5: Freezing chocolate pudding is not recommended as it can alter the texture and make it grainy or watery upon thawing. Freshly made pudding is always best.
Q6: My pudding is too thick. How can I thin it out?
A6: If your pudding becomes too thick, you can thin it out by whisking in a little extra milk, one tablespoon at a time, until you reach your desired consistency. Do this while the pudding is still warm.
Q7: My pudding is not thickening. What did I do wrong?
A7: Ensure you are using the correct amount of cornstarch and that you are cooking the pudding over medium heat, stirring constantly, until it comes to a simmer. It’s important to allow the cornstarch to fully activate and thicken the pudding. If it still doesn’t thicken after simmering for a few minutes, you may need to increase the heat slightly and continue stirring.
Q8: Can I make this pudding ahead of time?
A8: Yes, this chocolate pudding is perfect for making ahead of time! In fact, chilling it for at least 2-3 hours or overnight is necessary for it to set properly and for the flavors to meld. It’s a great dessert to prepare in advance for gatherings or busy weeknights.
Enjoy the delightful simplicity and rich chocolatey flavor of this easy homemade pudding recipe. It’s a guaranteed crowd-pleaser that’s perfect for any occasion!


