
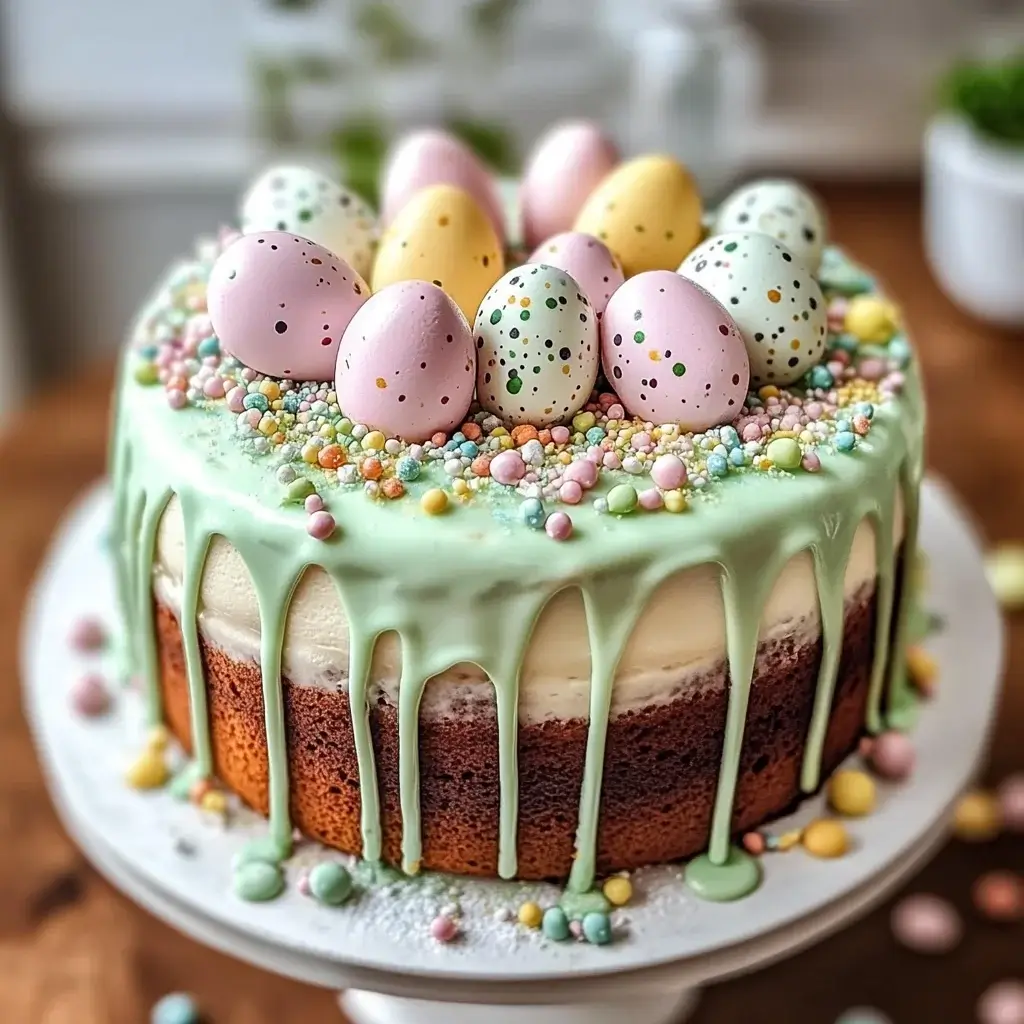
Easter baking has always been a cherished tradition in our home, a time when the kitchen fills with the sweet aroma of vanilla, chocolate, and the promise of delightful treats. This year, I decided to try something a little different, something that would not only taste delicious but also capture the whimsical spirit of Easter. Enter the Easter Speckled Egg Drip Cake. From the moment I saw a picture of this cake, I was captivated by its charm – the smooth, pastel hues, the playful chocolate drip, and those adorable speckled eggs nestled on top. Baking it was an absolute joy, transforming my kitchen into a colourful haven. And the taste? Oh, the taste! The moist vanilla cake, perfectly balanced sweetness of the frosting, and the rich chocolate drip created a symphony of flavours that had everyone, from the little ones to the grandparents, reaching for seconds. It wasn’t just a cake; it was a centerpiece of our Easter celebration, a conversation starter, and most importantly, a delicious testament to the joy of the season. If you’re looking for a show-stopping dessert that’s both beautiful and utterly delicious, look no further – this Easter Speckled Egg Drip Cake is guaranteed to become a new family favourite.
Ingredients
- For the Vanilla Cake:
- All-purpose flour: 3 cups, providing the structure for a tender crumb.
- Granulated sugar: 2 cups, for sweetness and moisture.
- Baking powder: 3 teaspoons, to ensure a light and airy rise.
- Baking soda: 1 teaspoon, working with baking powder for optimal leavening.
- Salt: 1 teaspoon, enhancing the flavours and balancing sweetness.
- Unsalted butter: 1 cup (2 sticks), softened, for richness and flavour.
- Vegetable oil: ½ cup, adding moisture and tenderness.
- Eggs: 4 large, binding the ingredients and adding richness.
- Vanilla extract: 2 teaspoons, for that classic vanilla flavour.
- Buttermilk: 1 cup, contributing to a moist and tangy cake.
- For the Vanilla Buttercream Frosting:
- Unsalted butter: 2 cups (4 sticks), softened, the base for a creamy frosting.
- Powdered sugar: 6-8 cups, for sweetness and structure.
- Vanilla extract: 2 teaspoons, complementing the cake flavour.
- Milk or heavy cream: 4-6 tablespoons, for adjusting consistency.
- Gel food colouring (pastel shades): For creating the desired pastel hues for frosting.
- For the Chocolate Drip:
- Semi-sweet chocolate chips or chopped chocolate: 1 cup, for a rich chocolate flavour.
- Heavy cream: ½ cup, to create a smooth and glossy drip.
- For the Speckled Eggs Decoration:
- Miniature chocolate eggs: Assorted pastel colours, the quintessential Easter decoration.
- Edible black food marker or cocoa powder and vodka: For creating the speckled effect on the eggs.
Instructions
- Preheat the Oven and Prepare Cake Pans: Preheat your oven to 350°F (175°C). Grease and flour three 8-inch round cake pans. You can also line the bottoms with parchment paper for easy removal. This initial step is crucial for ensuring your cakes bake evenly and release cleanly from the pans. Properly preparing the pans minimizes sticking and frustration later on.
- Combine Dry Ingredients: In a large bowl, whisk together the all-purpose flour, granulated sugar, baking powder, baking soda, and salt. Whisking ensures that all the dry ingredients are evenly distributed, preventing clumps of baking powder or soda, which can lead to uneven rising or a bitter taste. This step sets the foundation for a consistent cake texture.
- Cream Butter and Sugar: In a separate large bowl or the bowl of a stand mixer, cream together the softened unsalted butter and vegetable oil until light and fluffy. This process incorporates air into the batter, which is essential for a light and tender cake. Creaming butter and sugar properly is a fundamental step in achieving the desired cake texture.
- Incorporate Eggs and Vanilla: Add the eggs one at a time, beating well after each addition. Then, stir in the vanilla extract. Adding eggs gradually allows them to emulsify properly into the butter and sugar mixture, contributing to a smooth batter and rich flavour. Vanilla extract enhances the overall flavour profile of the cake.
- Alternate Wet and Dry Ingredients: Gradually add the dry ingredients to the wet ingredients, alternating with the buttermilk, beginning and ending with the dry ingredients. Mix until just combined. Be careful not to overmix at this stage. Overmixing can develop the gluten in the flour, resulting in a tough cake. Alternating wet and dry ingredients ensures even distribution and prevents gluten overdevelopment. The buttermilk adds moisture and a subtle tang, contributing to the cake’s deliciousness.
- Divide Batter and Bake: Divide the batter evenly among the prepared cake pans. Bake for 25-30 minutes, or until a toothpick inserted into the center comes out clean. Baking time can vary depending on your oven, so it’s important to use a toothpick test to ensure the cakes are fully baked. Overbaking can lead to a dry cake, while underbaking will result in a soggy center.
- Cool Cakes Completely: Let the cakes cool in the pans for 10-15 minutes before inverting them onto a wire rack to cool completely. Cooling the cakes in the pans slightly prevents them from breaking apart when inverted. Ensure the cakes are completely cool before frosting, as warm cakes will melt the frosting, leading to a messy result.
- Prepare Vanilla Buttercream Frosting: While the cakes are cooling, prepare the vanilla buttercream frosting. In a large bowl or the bowl of a stand mixer, beat the softened unsalted butter until light and fluffy. Gradually add the powdered sugar, one cup at a time, beating well after each addition. Add the vanilla extract and milk or heavy cream, and beat until smooth and creamy. Adjust the consistency by adding more milk or powdered sugar as needed. A smooth and creamy buttercream is essential for easy frosting and a beautiful finish.
- Colour the Frosting (Optional): Divide the frosting into separate bowls and tint each bowl with pastel gel food colouring to achieve your desired Easter colour palette. Gel food colouring is preferred over liquid as it is more concentrated and less likely to alter the frosting consistency. Pastel colours perfectly complement the Easter theme.
- Assemble and Frost the Cake: Place one cake layer on a cake stand or serving plate. Frost the top with a layer of buttercream. Repeat with the remaining cake layers, stacking them and frosting between each layer. Once all layers are stacked, frost the entire cake with a crumb coat (a thin layer of frosting to seal in crumbs). Chill the cake in the refrigerator for 30 minutes to allow the crumb coat to set. This crumb coat is essential for achieving a smooth and professional finish as it prevents crumbs from mixing into the final layer of frosting.
- Final Frosting and Drip: Apply the final layer of buttercream frosting to the cake, smoothing it out with a spatula or cake smoother for a polished look. Prepare the chocolate drip by heating the semi-sweet chocolate chips and heavy cream in a microwave-safe bowl in 30-second intervals, stirring after each interval, until smooth and melted. Let the chocolate drip cool slightly until it reaches a pourable consistency. Carefully pour the chocolate drip around the edges of the cake, allowing it to drip down the sides. Then, fill in the top of the cake with the remaining chocolate drip. Cooling the drip slightly is important to prevent it from being too runny and sliding right off the cake, or from being too hot and melting the frosting.
- Decorate with Speckled Eggs: While the chocolate drip is still slightly wet, arrange the miniature speckled chocolate eggs on top of the cake. For a more authentic speckled effect on the eggs themselves, you can use an edible black food marker to draw small speckles or mix a tiny amount of cocoa powder with vodka to create a paint-like speckling mixture and apply it with a fine brush. Get creative with the arrangement of the eggs to create a visually appealing Easter centerpiece.
- Chill and Serve: Chill the decorated cake in the refrigerator for at least 30 minutes to allow the chocolate drip to set and the frosting to firm up. This chilling time also helps the cake layers settle and makes slicing easier. Serve the Easter Speckled Egg Drip Cake and enjoy!
Nutrition Facts
(Per Serving, Servings: 12, approximate values)
- Calories: 550-650 kcal
- Fat: 30-35g
Note: Nutritional values are estimates and can vary based on specific ingredients and serving sizes.
Preparation Time
- Prep Time: 1 hour (includes batter making, frosting preparation, and chocolate drip)
- Bake Time: 25-30 minutes
- Cooling Time: 2-3 hours (for cakes and chocolate drip)
- Decoration Time: 30-45 minutes
- Total Time: Approximately 4-5 hours (including cooling and chilling time)
This timeframe includes active preparation and baking, as well as cooling and decorating. Actual time may vary depending on baking experience and pace.
How to Serve
- Chilled Slices: Serve the Easter Speckled Egg Drip Cake chilled for the best flavour and texture. The cold cake slices beautifully and the frosting is pleasantly firm.
- Accompaniments:
- Vanilla Ice Cream: A scoop of creamy vanilla ice cream complements the cake perfectly, adding a cool and smooth contrast.
- Fresh Berries: Serve with a side of fresh berries like strawberries, raspberries, or blueberries. Their tartness balances the sweetness of the cake.
- Whipped Cream: A dollop of lightly sweetened whipped cream adds extra richness and lightness.
- Beverages:
- Coffee or Tea: Pair with a hot cup of coffee or tea to balance the sweetness and enhance the flavours.
- Milk: For a kid-friendly option, serve with a glass of cold milk.
- Sparkling Wine or Prosecco: For a festive touch, especially for Easter brunch or dinner, a glass of sparkling wine or Prosecco can be a delightful pairing.
- Presentation:
- Cake Stand: Display the cake on a beautiful cake stand to make it the centerpiece of your dessert table.
- Garnishes: Add extra fresh berries or mint sprigs around the cake stand for a visually appealing presentation.
- Candles: For a special occasion, consider adding Easter-themed candles or sparklers for a celebratory touch.
Additional Tips for the Perfect Easter Speckled Egg Drip Cake
- Measure Ingredients Accurately: Baking is a science, and precise measurements are key to success. Use measuring cups and spoons for dry and liquid ingredients, and level off dry ingredients for accuracy. Using a kitchen scale for weighing ingredients, especially flour, is even more precise and recommended for consistent results.
- Use Room Temperature Ingredients: Ensure your butter, eggs, and buttermilk are at room temperature before starting. Room temperature ingredients emulsify more easily, creating a smoother batter and a better cake texture. Cold ingredients can cause the batter to curdle or not mix properly.
- Don’t Overmix the Batter: Overmixing develops gluten in the flour, leading to a tough cake. Mix the batter until just combined, meaning the ingredients are incorporated and no streaks of flour remain. A few lumps are okay. Stop mixing as soon as the batter comes together to ensure a tender crumb.
- Cool Cakes Completely Before Frosting: Frosting a warm cake will cause the frosting to melt and slide off, resulting in a messy cake. Ensure the cakes are completely cooled before frosting, ideally on a wire rack. You can even chill the cakes briefly in the refrigerator to speed up the cooling process.
- Make a Crumb Coat: A crumb coat is a thin layer of frosting applied to the cake before the final layer. It traps crumbs and creates a smooth surface for the final frosting. Chill the cake after the crumb coat to set it before applying the final layer of frosting for a professional finish.
- Practice Your Drip Technique: For a perfect chocolate drip, ensure the chocolate drip is at the right consistency – pourable but not too runny. Test the drip on the side of a bowl or glass before applying it to the cake. Start with small amounts and gradually add more drip as needed. You can use a squeeze bottle or a spoon for controlled application.
- Get Creative with Decorations: While speckled eggs are classic, feel free to get creative with your decorations. Add edible flowers, sprinkles, Easter candies, or create a nest-like effect with shredded coconut for the eggs. Personalize your cake to reflect your own style and preferences.
- Make Ahead and Store Properly: The cake layers can be baked a day ahead and stored tightly wrapped at room temperature. The frosting can also be made a day ahead and stored in the refrigerator. Assemble and decorate the cake on the day you plan to serve it. Once frosted, store the cake in an airtight container in the refrigerator for up to 3-4 days. Bring to room temperature for about 30 minutes before serving for best flavour and texture.
Frequently Asked Questions (FAQ)
Q1: Can I use a different type of cake for this recipe?
A: Yes, you can definitely adapt this recipe with different cake flavours. Chocolate cake, lemon cake, or even carrot cake would work beautifully. Just adjust the frosting and decorations to complement the cake flavour. For example, a lemon cake would pair wonderfully with a lemon buttercream frosting.
Q2: Can I make this cake ahead of time?
A: Absolutely! The cake layers can be baked a day or two in advance and stored tightly wrapped at room temperature or in the refrigerator. The buttercream frosting can also be made ahead and stored in the refrigerator for up to 3 days. Just bring it to room temperature and re-whip before using. Assemble and decorate the cake on the day you plan to serve it for the freshest results.
Q3: How do I get a smooth chocolate drip?
A: The key to a smooth drip is the ratio of chocolate to cream and the temperature. Use good quality chocolate and heavy cream. Heat them gently in the microwave or over a double boiler until just melted and smooth. Let the drip cool slightly until it thickens to a pourable consistency. If it’s too hot, it will be too runny; if it’s too cold, it won’t drip properly. Practice makes perfect!
Q4: What if my cake layers are dry?
A: Dry cake layers can be due to overbaking or inaccurate measurements. Ensure you are measuring ingredients correctly and not overbaking the cakes. Check for doneness with a toothpick test – it should come out clean when inserted into the center. If your cakes are slightly dry, you can brush them with a simple syrup (equal parts sugar and water, heated until sugar dissolves) while they are still warm to add moisture.
Q5: How do I make the speckled eggs?
A: You can buy pre-made speckled miniature chocolate eggs, which are readily available during Easter season. Alternatively, you can create the speckled effect yourself. Use an edible black food marker to draw small speckles on plain pastel chocolate eggs. For a more subtle effect, mix a tiny amount of cocoa powder with a few drops of vodka (or lemon extract) to create a paint-like mixture and apply it with a fine brush. The vodka will evaporate, leaving behind the cocoa speckles.
Q6: Can I substitute any ingredients?
A: You can make some substitutions. For buttermilk, if you don’t have it, you can make a substitute by adding 1 tablespoon of lemon juice or white vinegar to 1 cup of milk and letting it sit for 5 minutes. For the vegetable oil, you can use melted coconut oil or another neutral oil. For the frosting, you can use different flavour extracts instead of vanilla, like almond or lemon extract.
Q7: How do I prevent the cake from sticking to the pans?
A: Properly greasing and flouring the cake pans is crucial. Use shortening or butter to grease the pans thoroughly, ensuring you reach all corners and sides. Then, dust the pans with flour, tapping out any excess. For extra insurance, you can line the bottoms of the pans with parchment paper rounds. This combination of greasing, flouring, and parchment paper greatly reduces the risk of sticking.
Q8: How long does this cake last?
A: Frosted Easter Speckled Egg Drip Cake will last for up to 3-4 days in the refrigerator when stored in an airtight container. For best flavour and texture, bring the cake to room temperature for about 30 minutes before serving. The cake is most delicious within the first 2-3 days.
Print
Easter Speckled Egg Drip Cake
Ingredients
- For the Vanilla Cake:
- All-purpose flour: 3 cups, providing the structure for a tender crumb.
- Granulated sugar: 2 cups, for sweetness and moisture.
- Baking powder: 3 teaspoons, to ensure a light and airy rise.
- Baking soda: 1 teaspoon, working with baking powder for optimal leavening.
- Salt: 1 teaspoon, enhancing the flavours and balancing sweetness.
- Unsalted butter: 1 cup (2 sticks), softened, for richness and flavour.
- Vegetable oil: ½ cup, adding moisture and tenderness.
- Eggs: 4 large, binding the ingredients and adding richness.
- Vanilla extract: 2 teaspoons, for that classic vanilla flavour.
- Buttermilk: 1 cup, contributing to a moist and tangy cake.
- For the Vanilla Buttercream Frosting:
- Unsalted butter: 2 cups (4 sticks), softened, the base for a creamy frosting.
- Powdered sugar: 6-8 cups, for sweetness and structure.
- Vanilla extract: 2 teaspoons, complementing the cake flavour.
- Milk or heavy cream: 4-6 tablespoons, for adjusting consistency.
- Gel food colouring (pastel shades): For creating the desired pastel hues for frosting.
- For the Chocolate Drip:
- Semi-sweet chocolate chips or chopped chocolate: 1 cup, for a rich chocolate flavour.
- Heavy cream: ½ cup, to create a smooth and glossy drip.
- For the Speckled Eggs Decoration:
- Miniature chocolate eggs: Assorted pastel colours, the quintessential Easter decoration.
- Edible black food marker or cocoa powder and vodka: For creating the speckled effect on the eggs.
Instructions
- Preheat the Oven and Prepare Cake Pans: Preheat your oven to 350°F (175°C). Grease and flour three 8-inch round cake pans. You can also line the bottoms with parchment paper for easy removal. This initial step is crucial for ensuring your cakes bake evenly and release cleanly from the pans. Properly preparing the pans minimizes sticking and frustration later on.
- Combine Dry Ingredients: In a large bowl, whisk together the all-purpose flour, granulated sugar, baking powder, baking soda, and salt. Whisking ensures that all the dry ingredients are evenly distributed, preventing clumps of baking powder or soda, which can lead to uneven rising or a bitter taste. This step sets the foundation for a consistent cake texture.
- Cream Butter and Sugar: In a separate large bowl or the bowl of a stand mixer, cream together the softened unsalted butter and vegetable oil until light and fluffy. This process incorporates air into the batter, which is essential for a light and tender cake. Creaming butter and sugar properly is a fundamental step in achieving the desired cake texture.
- Incorporate Eggs and Vanilla: Add the eggs one at a time, beating well after each addition. Then, stir in the vanilla extract. Adding eggs gradually allows them to emulsify properly into the butter and sugar mixture, contributing to a smooth batter and rich flavour. Vanilla extract enhances the overall flavour profile of the cake.
- Alternate Wet and Dry Ingredients: Gradually add the dry ingredients to the wet ingredients, alternating with the buttermilk, beginning and ending with the dry ingredients. Mix until just combined. Be careful not to overmix at this stage. Overmixing can develop the gluten in the flour, resulting in a tough cake. Alternating wet and dry ingredients ensures even distribution and prevents gluten overdevelopment. The buttermilk adds moisture and a subtle tang, contributing to the cake’s deliciousness.
- Divide Batter and Bake: Divide the batter evenly among the prepared cake pans. Bake for 25-30 minutes, or until a toothpick inserted into the center comes out clean. Baking time can vary depending on your oven, so it’s important to use a toothpick test to ensure the cakes are fully baked. Overbaking can lead to a dry cake, while underbaking will result in a soggy center.
- Cool Cakes Completely: Let the cakes cool in the pans for 10-15 minutes before inverting them onto a wire rack to cool completely. Cooling the cakes in the pans slightly prevents them from breaking apart when inverted. Ensure the cakes are completely cool before frosting, as warm cakes will melt the frosting, leading to a messy result.
- Prepare Vanilla Buttercream Frosting: While the cakes are cooling, prepare the vanilla buttercream frosting. In a large bowl or the bowl of a stand mixer, beat the softened unsalted butter until light and fluffy. Gradually add the powdered sugar, one cup at a time, beating well after each addition. Add the vanilla extract and milk or heavy cream, and beat until smooth and creamy. Adjust the consistency by adding more milk or powdered sugar as needed. A smooth and creamy buttercream is essential for easy frosting and a beautiful finish.
- Colour the Frosting (Optional): Divide the frosting into separate bowls and tint each bowl with pastel gel food colouring to achieve your desired Easter colour palette. Gel food colouring is preferred over liquid as it is more concentrated and less likely to alter the frosting consistency. Pastel colours perfectly complement the Easter theme.
- Assemble and Frost the Cake: Place one cake layer on a cake stand or serving plate. Frost the top with a layer of buttercream. Repeat with the remaining cake layers, stacking them and frosting between each layer. Once all layers are stacked, frost the entire cake with a crumb coat (a thin layer of frosting to seal in crumbs). Chill the cake in the refrigerator for 30 minutes to allow the crumb coat to set. This crumb coat is essential for achieving a smooth and professional finish as it prevents crumbs from mixing into the final layer of frosting.
- Final Frosting and Drip: Apply the final layer of buttercream frosting to the cake, smoothing it out with a spatula or cake smoother for a polished look. Prepare the chocolate drip by heating the semi-sweet chocolate chips and heavy cream in a microwave-safe bowl in 30-second intervals, stirring after each interval, until smooth and melted. Let the chocolate drip cool slightly until it reaches a pourable consistency. Carefully pour the chocolate drip around the edges of the cake, allowing it to drip down the sides. Then, fill in the top of the cake with the remaining chocolate drip. Cooling the drip slightly is important to prevent it from being too runny and sliding right off the cake, or from being too hot and melting the frosting.
- Decorate with Speckled Eggs: While the chocolate drip is still slightly wet, arrange the miniature speckled chocolate eggs on top of the cake. For a more authentic speckled effect on the eggs themselves, you can use an edible black food marker to draw small speckles or mix a tiny amount of cocoa powder with vodka to create a paint-like speckling mixture and apply it with a fine brush. Get creative with the arrangement of the eggs to create a visually appealing Easter centerpiece.
- Chill and Serve: Chill the decorated cake in the refrigerator for at least 30 minutes to allow the chocolate drip to set and the frosting to firm up. This chilling time also helps the cake layers settle and makes slicing easier. Serve the Easter Speckled Egg Drip Cake and enjoy!
Nutrition
- Serving Size: one normal portion
- Calories: 650
- Fat: 35g


