
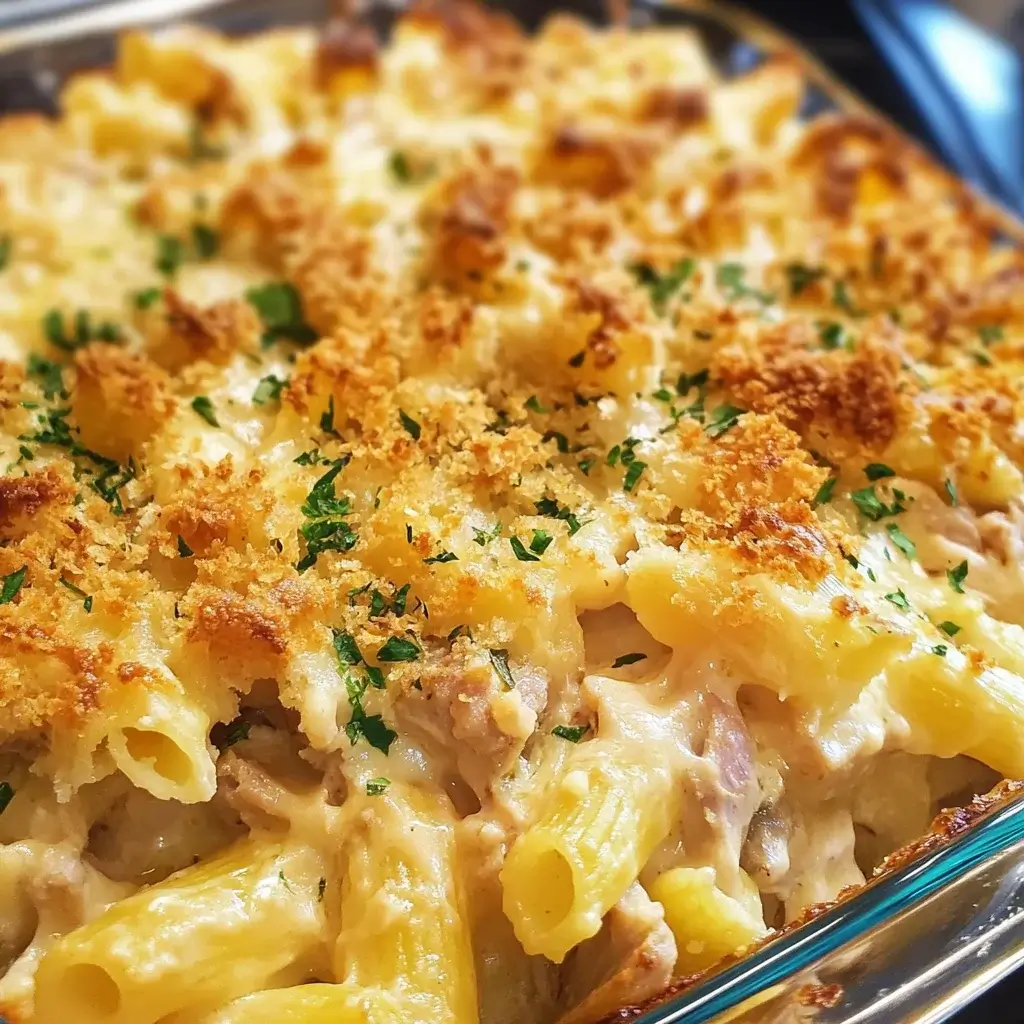
There’s something undeniably comforting about a warm, bubbly casserole, especially when it’s packed with creamy, cheesy goodness. For years, my family has been obsessed with a dish that ticks all those boxes and more: Cheesy Baked Tuna Casserole. It’s not just a meal; it’s a nostalgic hug in a dish. Whenever I make it, the aroma alone is enough to bring everyone to the kitchen, eager for a taste of this classic comfort food. Even my pickiest eater, who usually turns up their nose at anything “fishy,” devours this casserole with gusto. It’s the perfect weeknight dinner because it’s incredibly easy to throw together, uses pantry staples, and always satisfies. This isn’t your grandma’s bland tuna casserole; this is a modern, flavor-packed version that will have everyone asking for seconds. Get ready to rediscover the joy of tuna casserole – cheesy, creamy, and utterly delicious!
Ingredients: Your Pantry Staples Come to Life
- Tuna: (2 cans, 5 ounces each, drained) – The star of the show! Use tuna packed in water for a lighter option or oil for a richer flavor. Flaked tuna works best for even distribution throughout the casserole.
- Pasta: (1 pound, elbow macaroni or egg noodles) – The base of our casserole, providing a hearty and satisfying texture. Elbow macaroni is classic, but egg noodles offer a richer, softer bite.
- Cream of Mushroom Soup: (2 cans, 10.75 ounces each) – The creamy binder that brings everything together. It adds moisture and a savory, umami depth. You can also experiment with cream of celery or chicken soup for variations.
- Milk: (1 cup) – Adds extra creaminess and thins out the soup slightly for the perfect consistency. Whole milk will give the richest flavor, but 2% or even skim milk can be used.
- Shredded Cheese: (2 cups, cheddar or a blend) – The cheesy element that makes this casserole irresistible. Cheddar is a classic choice, but Monterey Jack, Colby, or a Mexican blend also work wonderfully. Reserve some for topping!
- Frozen Peas: (1 cup) – Adds a pop of color, sweetness, and a touch of freshness to balance the richness. No need to thaw them beforehand; they’ll cook perfectly in the oven.
- Onion: (1 medium, finely chopped) – Provides aromatic depth and savory flavor. Yellow or white onions are great choices.
- Celery: (2 stalks, finely chopped) – Adds a subtle crunch and fresh, herbaceous note.
- Breadcrumbs: (1/2 cup, panko or regular) – Creates a crispy, golden topping for added texture and visual appeal. Panko breadcrumbs offer extra crunch.
- Butter: (2 tablespoons, melted) – Mixed with the breadcrumbs, butter helps create a beautifully browned and flavorful topping.
- Salt and Pepper: (To taste) – Essential seasonings to enhance all the flavors. Adjust to your preference.
- Optional: Garlic Powder: (1 teaspoon) – Adds a subtle garlic flavor that complements the other ingredients.
- Optional: Paprika: (1/2 teaspoon) – Sprinkled on top, paprika adds color and a hint of smoky sweetness.
Instructions: Simple Steps to Casserole Perfection
- Preheat Your Oven & Prepare Baking Dish: Start by preheating your oven to 375°F (190°C). While the oven is heating, lightly grease a 9×13 inch baking dish. This will prevent the casserole from sticking and make serving easier.
- Cook the Pasta: Bring a large pot of salted water to a boil. Add the elbow macaroni or egg noodles and cook according to package directions until al dente. Don’t overcook the pasta, as it will continue to cook in the oven. Once cooked, drain the pasta well and set aside.
- Sauté Aromatics (Optional but Recommended): While the pasta is cooking, heat a tablespoon of butter or olive oil in a skillet over medium heat. Add the chopped onion and celery and sauté for about 5-7 minutes, or until softened and fragrant. This step enhances the flavor of the casserole significantly, but you can skip it for an even quicker preparation if needed. If using garlic powder, add it during the last minute of sautéing.
- Combine Ingredients in a Large Bowl: In a large mixing bowl, combine the drained tuna, cooked pasta, cream of mushroom soup, milk, sautéed onion and celery (if using), frozen peas, and most of the shredded cheese (reserve about ½ cup for topping). Season generously with salt and pepper. Mix everything together until well combined and creamy.
- Transfer to Baking Dish: Pour the tuna mixture into the prepared baking dish and spread it evenly.
- Prepare the Breadcrumb Topping: In a small bowl, combine the breadcrumbs and melted butter. Toss to coat the breadcrumbs evenly. If using paprika, you can mix it in with the breadcrumbs at this stage.
- Add Topping and Cheese: Sprinkle the remaining shredded cheese evenly over the casserole. Then, sprinkle the buttered breadcrumbs over the cheese layer. This will create a golden, crispy crust.
- Bake to Golden Perfection: Bake in the preheated oven for 20-25 minutes, or until the casserole is heated through, bubbly around the edges, and the breadcrumb topping is golden brown and crispy. The cheese should be melted and gooey.
- Rest Before Serving: Once baked, let the casserole rest for 5-10 minutes before serving. This allows it to set slightly and makes it easier to serve. The resting time also helps to prevent burning your mouth!
- Serve and Enjoy! Serve hot and enjoy the comforting flavors of your homemade Cheesy Baked Tuna Casserole!
Nutrition Facts (per serving)
(Note: Nutritional values are approximate and can vary based on specific ingredients and serving size)
- Servings: 8
- Calories: Approximately 350-450 kcal
- Protein: 20-25g
(These values are estimates and for informational purposes only. For precise nutritional information, use a nutrition calculator with the specific brands and quantities of ingredients used.)
Preparation Time: Quick and Easy Comfort
- Prep Time: 20 minutes (includes chopping vegetables and combining ingredients)
- Cook Time: 20-25 minutes (baking time in the oven)
- Total Time: Approximately 40-45 minutes
This Cheesy Baked Tuna Casserole is perfect for a busy weeknight dinner. The active preparation time is minimal, making it a great option when you need a delicious and satisfying meal on the table quickly.
How to Serve: Complete Your Comfort Meal
This Cheesy Baked Tuna Casserole is a hearty and satisfying dish on its own, but you can elevate your meal by serving it with complementary sides. Here are some delicious serving suggestions:
- Green Salad: A fresh and crisp green salad with a light vinaigrette dressing provides a refreshing contrast to the richness of the casserole. Consider a simple mixed greens salad, a Caesar salad, or a spinach salad with berries.
- Steamed or Roasted Vegetables: Add some extra nutrients and fiber to your meal with steamed or roasted vegetables. Broccoli, green beans, asparagus, carrots, or Brussels sprouts are all excellent choices. Roasting vegetables brings out their natural sweetness.
- Garlic Bread or Rolls: For extra comfort and to soak up all that delicious creamy sauce, serve warm garlic bread or soft dinner rolls alongside the casserole.
- Coleslaw: A creamy or vinegar-based coleslaw offers a cool and crunchy side that complements the warm casserole.
- Fruit Salad: A light and refreshing fruit salad provides a sweet and healthy finish to the meal.
- Tomato Soup: For a truly comforting and nostalgic meal, serve a small bowl of creamy tomato soup before or alongside the tuna casserole.
- Pickles or Relish: A side of pickles or relish can add a tangy and crunchy element to cut through the richness of the casserole.
Additional Tips for Tuna Casserole Perfection
- Boost the Flavor with Cheese Variety: Don’t be afraid to experiment with different types of cheese! Try adding a sharp cheddar for a bolder flavor, Gruyere for nuttiness, or pepper jack for a spicy kick. A combination of cheeses can create a more complex and interesting flavor profile.
- Upgrade Your Veggies: While peas are classic, feel free to add other vegetables to your tuna casserole. Diced carrots, corn, bell peppers, mushrooms, or even spinach can add extra nutrients and flavor. Sautéing vegetables like mushrooms or bell peppers before adding them to the casserole will enhance their flavor.
- Spice it Up!: If you like a little heat, add a pinch of red pepper flakes or a dash of hot sauce to the casserole mixture. You can also use pepper jack cheese or add some chopped jalapenos for a spicier version.
- Make it Creamier: For an extra creamy casserole, substitute half of the milk with sour cream or cream cheese. Stir in a few tablespoons of sour cream or softened cream cheese to the mixture before baking for added richness and tang.
- Crispy Onion Topping: For a classic and irresistible topping, use crispy fried onions instead of breadcrumbs. Sprinkle them generously over the casserole before baking for a salty, crunchy, and flavorful crust.
- Make it Ahead: You can assemble the tuna casserole ahead of time and store it, covered, in the refrigerator for up to 24 hours. Bake as directed when you’re ready to serve, adding a few extra minutes to the baking time if needed since it will be starting cold.
- Freeze for Later: Tuna casserole freezes well, making it a great make-ahead meal. Assemble the casserole in a freezer-safe dish, cover tightly with plastic wrap and foil, and freeze for up to 3 months. Thaw overnight in the refrigerator before baking as directed, or bake from frozen, adding extra baking time.
- Healthier Swaps: To make a slightly healthier tuna casserole, use whole wheat pasta, low-sodium cream of mushroom soup, and reduced-fat cheese. You can also add more vegetables and use whole wheat breadcrumbs for the topping. Consider using Greek yogurt instead of some of the milk for added protein and tang with fewer calories.
FAQ: Your Tuna Casserole Questions Answered
Q1: Can I use fresh tuna instead of canned?
A: While canned tuna is traditional and convenient for tuna casserole, you can use cooked fresh tuna if you prefer. Flake cooked tuna steaks or fillets and use them in place of canned tuna. Ensure the fresh tuna is fully cooked before adding it to the casserole.
Q2: Can I make tuna casserole without cream of mushroom soup?
A: Yes, you can substitute cream of mushroom soup with other creamy sauces. You can use cream of celery soup, cream of chicken soup, or even make a homemade white sauce (béchamel) as a base. To make a simple homemade cream sauce, melt butter, whisk in flour, gradually add milk, and cook until thickened. Season with salt, pepper, and nutmeg.
Q3: What kind of pasta is best for tuna casserole?
A: Elbow macaroni and egg noodles are the most classic choices for tuna casserole. Elbow macaroni holds its shape well and provides a good texture, while egg noodles offer a richer, softer bite. You can also use other short pasta shapes like rotini, penne, or shells. Avoid long pasta shapes like spaghetti or fettuccine, as they can be harder to mix and serve in a casserole.
Q4: How do I prevent my tuna casserole from being dry?
A: To prevent a dry tuna casserole, ensure you have enough liquid in the mixture. The cream of mushroom soup and milk provide moisture. If you find your casserole is still dry, you can add a little more milk or even a splash of chicken broth to the mixture before baking. Also, avoid overbaking the casserole, as this can dry it out. Bake until it’s heated through and bubbly, but not overly browned.
Q5: Can I add a crunchy topping other than breadcrumbs?
A: Absolutely! Besides breadcrumbs and crispy fried onions, you can use crushed potato chips, Ritz crackers, or even chopped nuts for a crunchy topping. Experiment with different textures and flavors to find your favorite topping.
Q6: Is tuna casserole healthy?
A: Tuna casserole can be part of a balanced diet, but it’s not inherently “healthy” due to its creamy and cheesy nature. However, you can make healthier choices by using whole wheat pasta, low-sodium soup, reduced-fat cheese, adding more vegetables, and using lean protein sources. Portion control is also key.
Q7: How long does tuna casserole last in the refrigerator?
A: Cooked tuna casserole can be stored in an airtight container in the refrigerator for 3-4 days. Ensure it is cooled completely before refrigerating. Reheat thoroughly until heated through before serving.
Q8: Can I make tuna casserole in a slow cooker?
A: Yes, you can adapt this recipe for a slow cooker. Combine all ingredients except the breadcrumb topping in a slow cooker. Cook on low for 4-6 hours or on high for 2-3 hours, or until heated through. In the last 30 minutes of cooking, sprinkle the breadcrumb topping and cheese over the casserole and continue cooking until the cheese is melted and the topping is lightly browned (the topping won’t get as crispy in a slow cooker as in the oven).
This Cheesy Baked Tuna Casserole is more than just a recipe; it’s a comforting classic that’s perfect for family dinners, potlucks, or any time you crave a warm and satisfying meal. With its simple ingredients and easy preparation, it’s a dish you’ll turn to again and again. Enjoy!
Print
Cheesy Baked Tuna Casserole
Ingredients
- Tuna: (2 cans, 5 ounces each, drained) – The star of the show! Use tuna packed in water for a lighter option or oil for a richer flavor. Flaked tuna works best for even distribution throughout the casserole.
- Pasta: (1 pound, elbow macaroni or egg noodles) – The base of our casserole, providing a hearty and satisfying texture. Elbow macaroni is classic, but egg noodles offer a richer, softer bite.
- Cream of Mushroom Soup: (2 cans, 10.75 ounces each) – The creamy binder that brings everything together. It adds moisture and a savory, umami depth. You can also experiment with cream of celery or chicken soup for variations.
- Milk: (1 cup) – Adds extra creaminess and thins out the soup slightly for the perfect consistency. Whole milk will give the richest flavor, but 2% or even skim milk can be used.
- Shredded Cheese: (2 cups, cheddar or a blend) – The cheesy element that makes this casserole irresistible. Cheddar is a classic choice, but Monterey Jack, Colby, or a Mexican blend also work wonderfully. Reserve some for topping!
- Frozen Peas: (1 cup) – Adds a pop of color, sweetness, and a touch of freshness to balance the richness. No need to thaw them beforehand; they’ll cook perfectly in the oven.
- Onion: (1 medium, finely chopped) – Provides aromatic depth and savory flavor. Yellow or white onions are great choices.
- Celery: (2 stalks, finely chopped) – Adds a subtle crunch and fresh, herbaceous note.
- Breadcrumbs: (1/2 cup, panko or regular) – Creates a crispy, golden topping for added texture and visual appeal. Panko breadcrumbs offer extra crunch.
- Butter: (2 tablespoons, melted) – Mixed with the breadcrumbs, butter helps create a beautifully browned and flavorful topping.
- Salt and Pepper: (To taste) – Essential seasonings to enhance all the flavors. Adjust to your preference.
- Optional: Garlic Powder: (1 teaspoon) – Adds a subtle garlic flavor that complements the other ingredients.
- Optional: Paprika: (1/2 teaspoon) – Sprinkled on top, paprika adds color and a hint of smoky sweetness.
Instructions
- Preheat Your Oven & Prepare Baking Dish: Start by preheating your oven to 375°F (190°C). While the oven is heating, lightly grease a 9×13 inch baking dish. This will prevent the casserole from sticking and make serving easier.
- Cook the Pasta: Bring a large pot of salted water to a boil. Add the elbow macaroni or egg noodles and cook according to package directions until al dente. Don’t overcook the pasta, as it will continue to cook in the oven. Once cooked, drain the pasta well and set aside.
- Sauté Aromatics (Optional but Recommended): While the pasta is cooking, heat a tablespoon of butter or olive oil in a skillet over medium heat. Add the chopped onion and celery and sauté for about 5-7 minutes, or until softened and fragrant. This step enhances the flavor of the casserole significantly, but you can skip it for an even quicker preparation if needed. If using garlic powder, add it during the last minute of sautéing.
- Combine Ingredients in a Large Bowl: In a large mixing bowl, combine the drained tuna, cooked pasta, cream of mushroom soup, milk, sautéed onion and celery (if using), frozen peas, and most of the shredded cheese (reserve about ½ cup for topping). Season generously with salt and pepper. Mix everything together until well combined and creamy.
- Transfer to Baking Dish: Pour the tuna mixture into the prepared baking dish and spread it evenly.
- Prepare the Breadcrumb Topping: In a small bowl, combine the breadcrumbs and melted butter. Toss to coat the breadcrumbs evenly. If using paprika, you can mix it in with the breadcrumbs at this stage.
- Add Topping and Cheese: Sprinkle the remaining shredded cheese evenly over the casserole. Then, sprinkle the buttered breadcrumbs over the cheese layer. This will create a golden, crispy crust.
- Bake to Golden Perfection: Bake in the preheated oven for 20-25 minutes, or until the casserole is heated through, bubbly around the edges, and the breadcrumb topping is golden brown and crispy. The cheese should be melted and gooey.
- Rest Before Serving: Once baked, let the casserole rest for 5-10 minutes before serving. This allows it to set slightly and makes it easier to serve. The resting time also helps to prevent burning your mouth!
- Serve and Enjoy! Serve hot and enjoy the comforting flavors of your homemade Cheesy Baked Tuna Casserole!
Nutrition
- Serving Size: one normal portion
- Calories: 450
- Protein: 25g


